A large prototype yard-size snowflake made from pallet wood. Approximately 60" in height. I added some "errors" to make it "homebuilt looking" and a 3D effect in the center.
My old bench needed to be be upgraded. The original was too long and I could not walk around it to work on projects. Even though it was on wheels it was difficult to move, and it had developed a bow from being made from 2X4's and spanning two separate slabs that move at slightly different rates. When the extra slab was added, it was not tied into the original.
While the new bench is similar to the old one, there are some changes being made. Better use of space for storage, a "torsion style" top, it is not absolutely perfectly flat, but it does have a 1/32 inch "error", I can live with this. I will be making an adjustable mechanism for the table saw to level it with the assembly/outfeed portion of the table using all thread, washers and nuts which will give me some fine control over movement, and it will give me the ability to replace the saw if needed and make adjustments.
Finding quality plywood is a problem, so I'm using construction grade and filling with wood bondo as needed. I plan to sand the top down to about 220 grit and will either clear coat or possibly apply Formica laminate, I have not decided. Right now I'm leaning to clear coat and adding an oak edge trim, I have a lot of antique oak flooring I could run through my thickness planer and make some durable edges.
The small cubbies that you see are planned for tool storage, clamps etcetera or maybe shelves for fasteners. With placing a 4' level across the top it is level, thanks to the leveling feet I used in this build.
After the initial post of the new bench, the top "deck", work surface edges have now been doubled to 1 1/2 inches so I can install the oak face material when I get that milled. The work surface has been sanded down to 240 grit in preparation for finishing. I think I have some old school varnish left in my stock, hopefully enough for 3-4 coats for a very hard durable surface.
Edge material added to the work surface. Instead of oak, I found some pieces of mahogany strips I had, my thought was that when the finish is applied, the "red" color of the mahogany will pop nicely. This stuff had become warped and bent while in storage. It was a real job to straighten this.
I will fill the brad nail holes tomorrow and hopefully get the lift mechanism worked out. There is still much work to be done to complete this project. With the holidays I have a lot of paid time off so I am making use of that time.
A little closer to completion, saw and leveling mechanism installed, additional work support to the left of the saw, channels for sleds and guides are routed into the surface and the first coat of polyurethane. Things will be at a standstill until I get finished with the poly. A light sanding between coats and I should have a very nice surface. With the colder weather dry-time will be increased. All-in-all a good day.
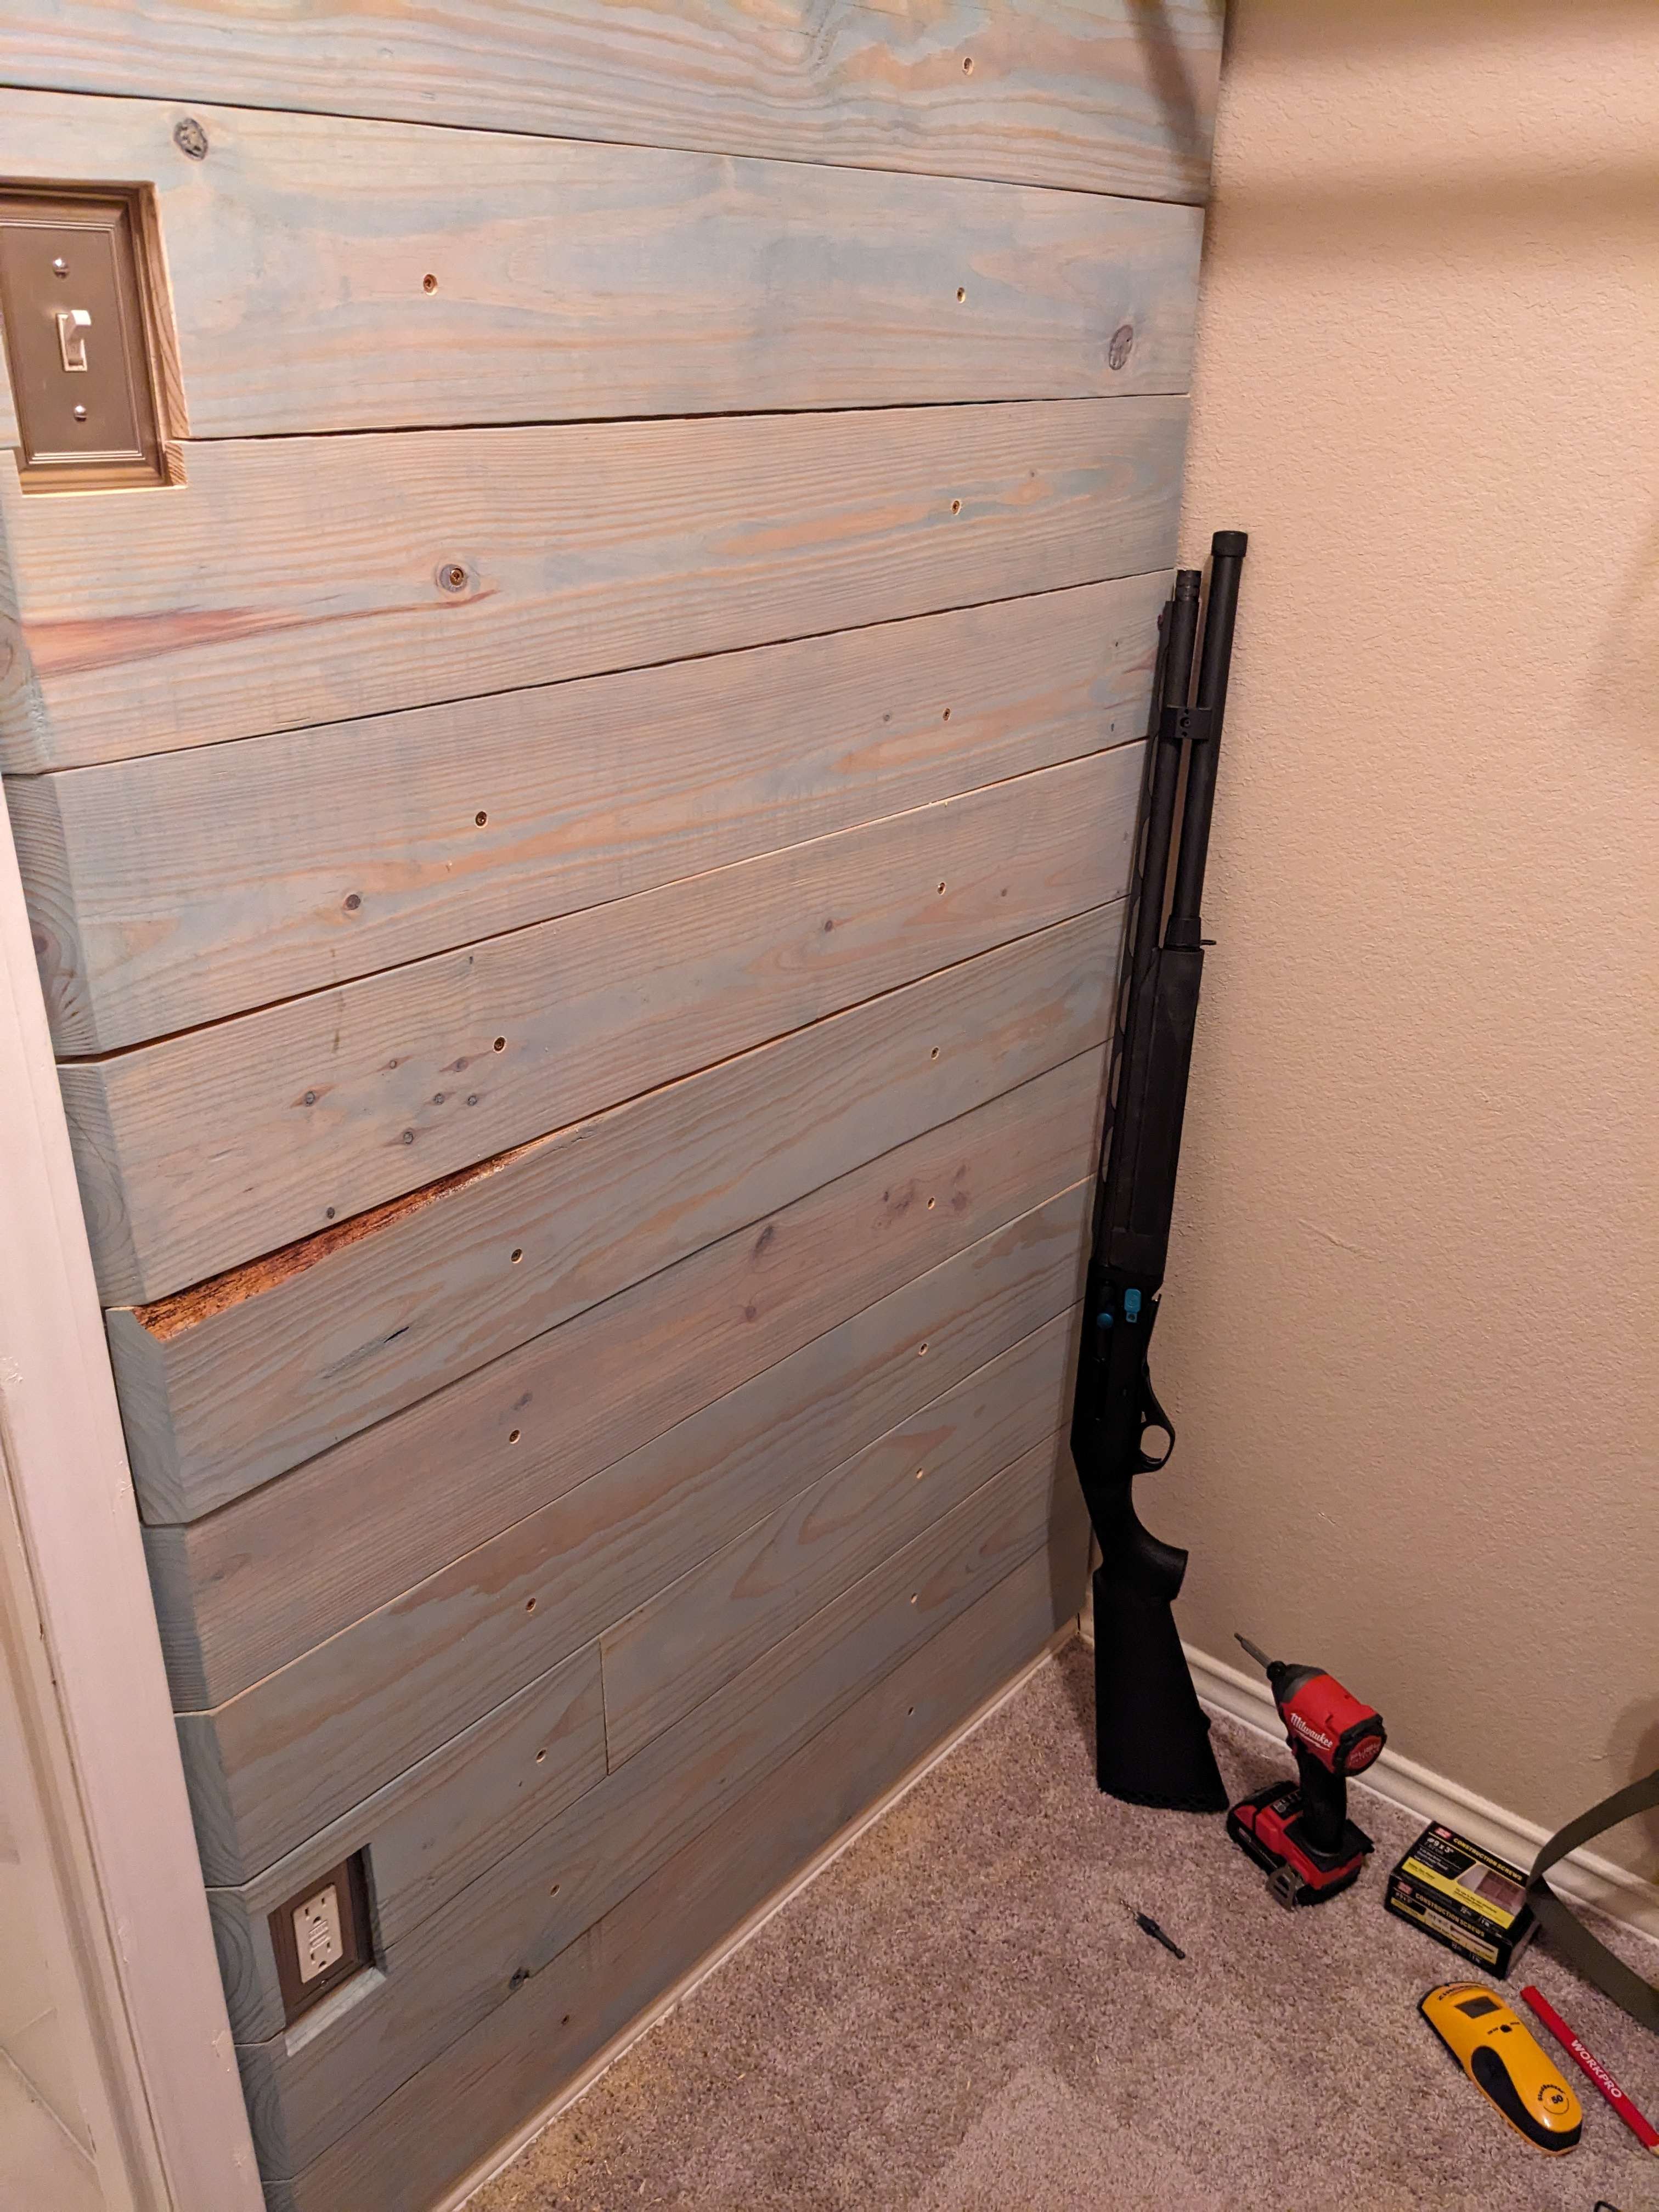
I added a bit of wood to my gun closet as a weekend shop project. I like it enough to do the same as an accent wall in my breakfast area. I made a couple mistakes; specifically around the light switch, but overall I'm mostly happy with it. Its a little too chilly for sanding, cutting, and staining outside so I have wood dust all over my garage but overall woodworking isn't so bad. Kinda want to make a box and some other stuff just for fun. I wish wood weren't so expensive so I could dink around with trying things with what I've got and the mistakes go into the fireplace.
They're just 1x6 pine stained with a "Vintage Blue" by Minwax.
Still undecided if I should screw hooks to hang guns off it, or just buy a gun rack and leave it on the floor next to the wall.
If you do a little looking around find pallets to play with, get a pallet breaker to disassemble them. If you mess something up it was nearly free wood. I do this all of the time. Make your own switch cover, you know your screw locations, go to the hardware store and get longer screws with the same thread pitch, you don't even need to move the switch box that way. put some spacers between the wall box and the switch to move it away from the pre-existing wall, this can be made from some rubber tubing, even some nuts on the longer screws.
I intentionally left the outlet recessed because its a closet, I'll likely only ever plug a vacuum cleaner into it. The light switch I've missed a couple times but realistically I won't be walking into the closet without the bathroom light on anyway. A buddy of mine asked why I didn't un-flush the switch and outlet, and mostly I just don't like working with electrical. Also I intended on adding a bevel around the outlet, but after breaking 1 plank I avoided manipulating the material so thin with 2 bevels so close to the edge. The failed plank is 3rd from the bottom along with another end-cut. So far it doesn't bother me much. If it does start bothering me I'll take 2 planks off and attempt a bevel.
The accent wall in the breakfast area I'll be adding a 45 degree bevel around the 1 outlet to make a night-light and plugging stuff in easier.
My Christmas Gift to myself arrived today. It is assembled and the break-in has been done. I still need to anchor it to the mobile base cabinet. I repurposed my thickness planer base for this, I need to build a base for the planer with extensions for longer pieces of material.
The laser was spot on right out of the box. Very smooth and virtually no vibration of any kind, adjustable speed of this particular unit is 485 RPM to 3417 RPM at no load. I also need to make a table for wood work.
Just like guns, buy once cry once! LOL!! Drill press is anchored and reinforced with double washers at the bolt head and nut. Ordered some rare earth magnets to keep the table I'm planning to build in place on the metal top. This damn thing is HEAVY! I could barely lift the head unit to the top of the support pole. I had originally planned for this to go on a benchtop, but I missed the depth of the head unit when I was reading the specifications, so I had to improvise. If I had ordered a different unit the 8 inch instead of the 15 inch I would have been GTG. Oh well no complaints, this should last me the rest of my life. As stated earlier, virtually no vibration, I can't wait to get my table built and to start using sanding tubes and other accessories to make projects easier to build.
Quick and dirty drill press table (18" X 24") with fence, replaceable insert and 3 coats of spray on (rattle can MinWax) clear finish. When I dismantled my old work table I kept some of the 3/4 inch particle board to repurpose, this is most of it. I placed a magnetic tool holder on the right side to keep me from loosing my drill chuck, damn gremlins steal them all the time!

.png)