
You are using an out of date browser. It may not display this or other websites correctly.
You should upgrade or use an alternative browser.
You should upgrade or use an alternative browser.
Pre 64 Winchester Model 1894 Sporting Rifle - From wall hanger to shooter.
- Thread starter RedArmy
- Start date
The #1 community for Gun Owners in Texas
Member Benefits:
Fewer Ads! Discuss all aspects of firearm ownership Discuss anti-gun legislation Buy, sell, and trade in the classified section Chat with Local gun shops, ranges, trainers & other businesses Discover free outdoor shooting areas View up to date on firearm-related events Share photos & video with other members ...and so much more!
Member Benefits:

That is absolutely AWESOME!!
Now that's just awesome!
That is absolutely AWESOME!!
Ha, you beat me to it, took the words right out of my mouth.
More progress on this old girl, all that remains left to do is the engraving and bluing. Thinking I may attempt the bluing at home since I need a weathered finish. We'll see.
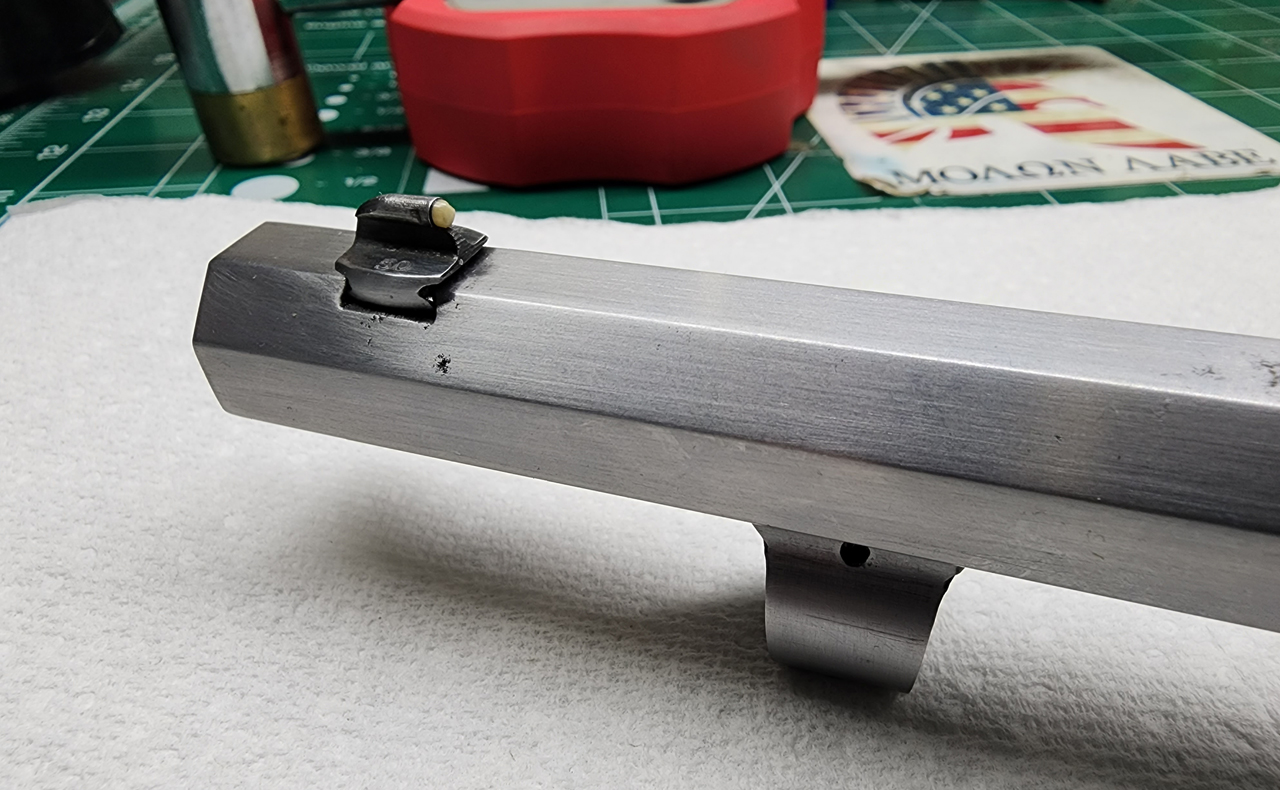
Got the dovetail for the tenon cut in the new barrel.
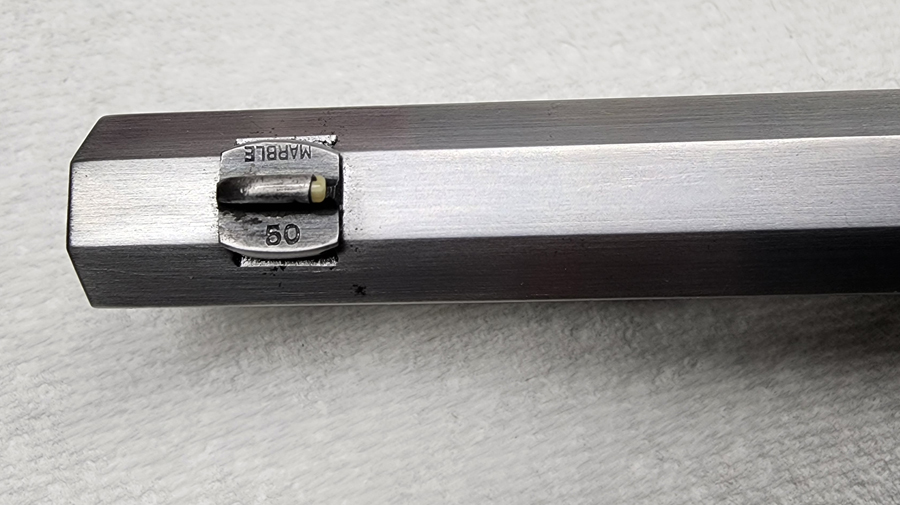
Original front sight fitted, the marble bead has a small chip I figure it just adds to the character.
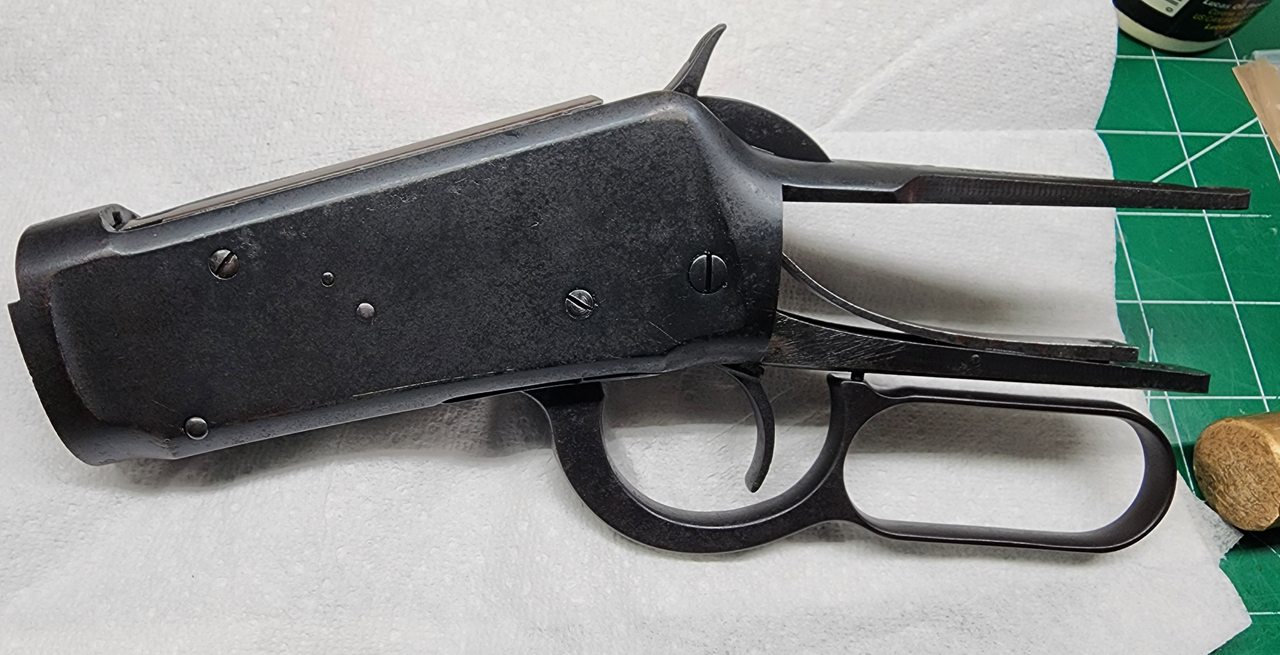
Stripped the receiver and bolt down for cleaning and inspection, all checked out. I couldn't find anything that required replacement, pretty amazing for such an old gun. The extractor is still sharp and it's spring strong.
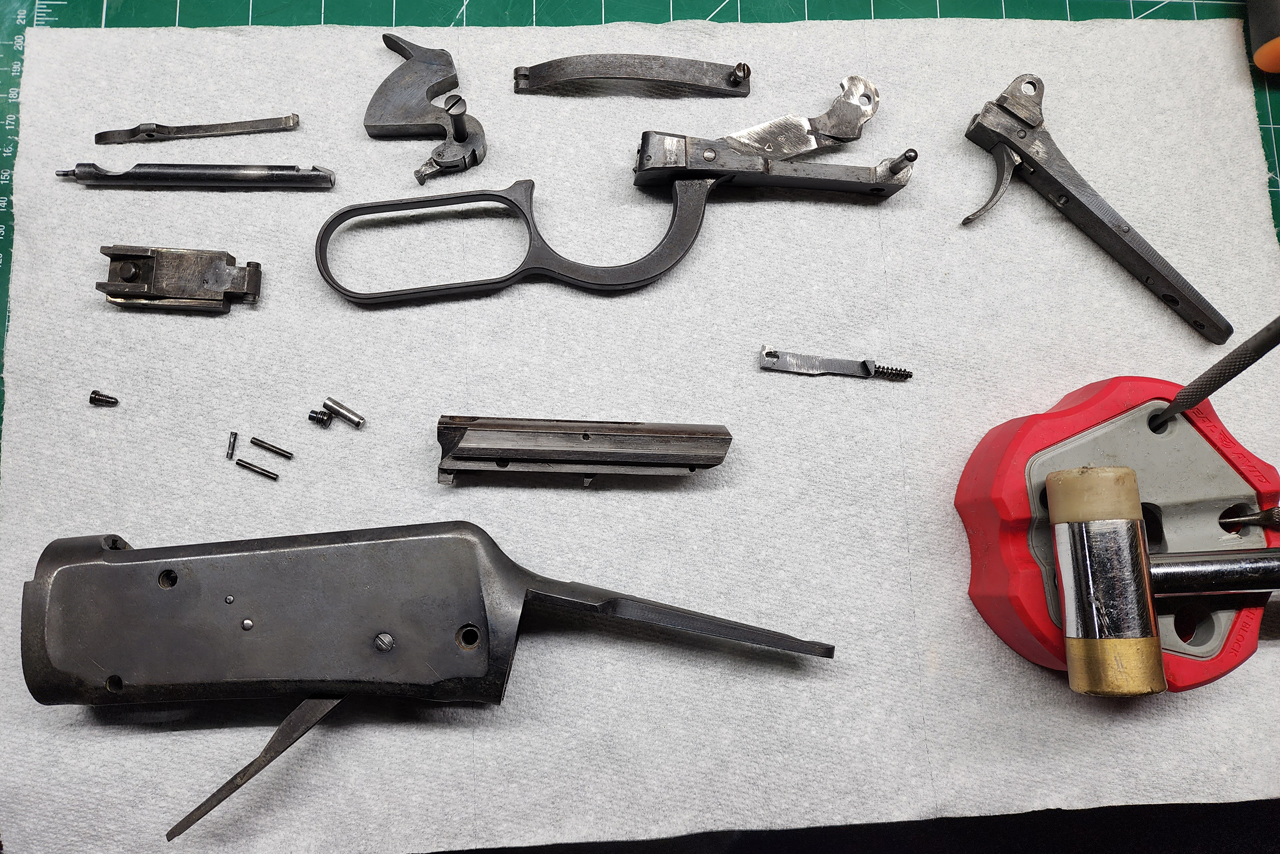
Cleaned lubed and ready to go. Action is as smooth as can be, it makes a nice sharp click when cocking the hammer back now. Trigger pull is fantastic. I did replace the hammer and pivot screws due to the slots being buggered up, I sanded some of the finish off of them so they matched the other screws.
This is the cracked piece of the forearm, the wood was very dry and probably contributed to the cracking.
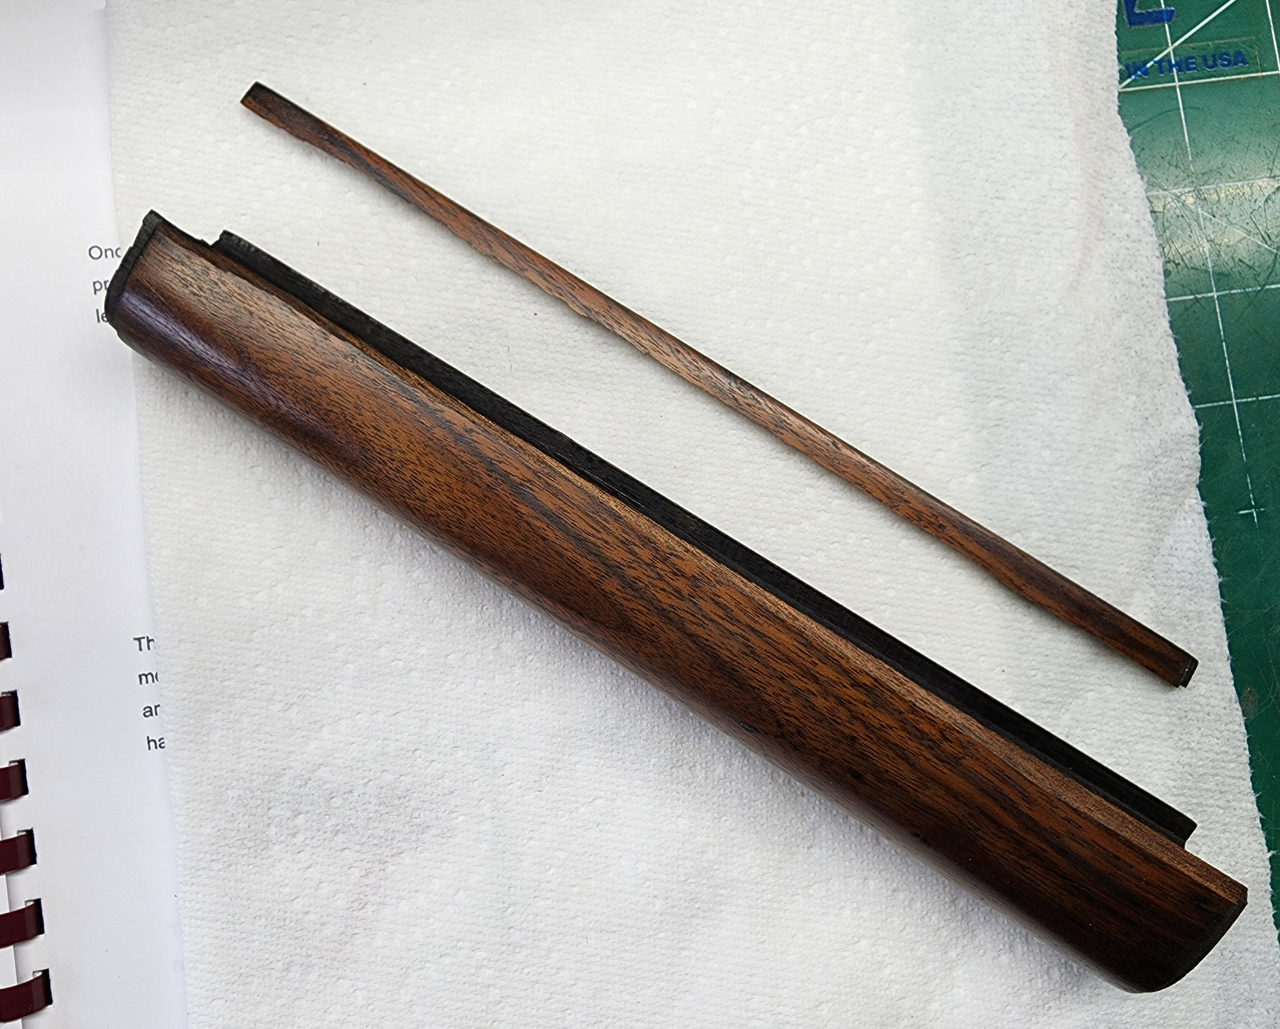
I used clear epoxy to glue it back in place, it's hard as steel now. The repair is almost invisible, I treated the whole thing inside and out with Winchester Restorations stock oil.
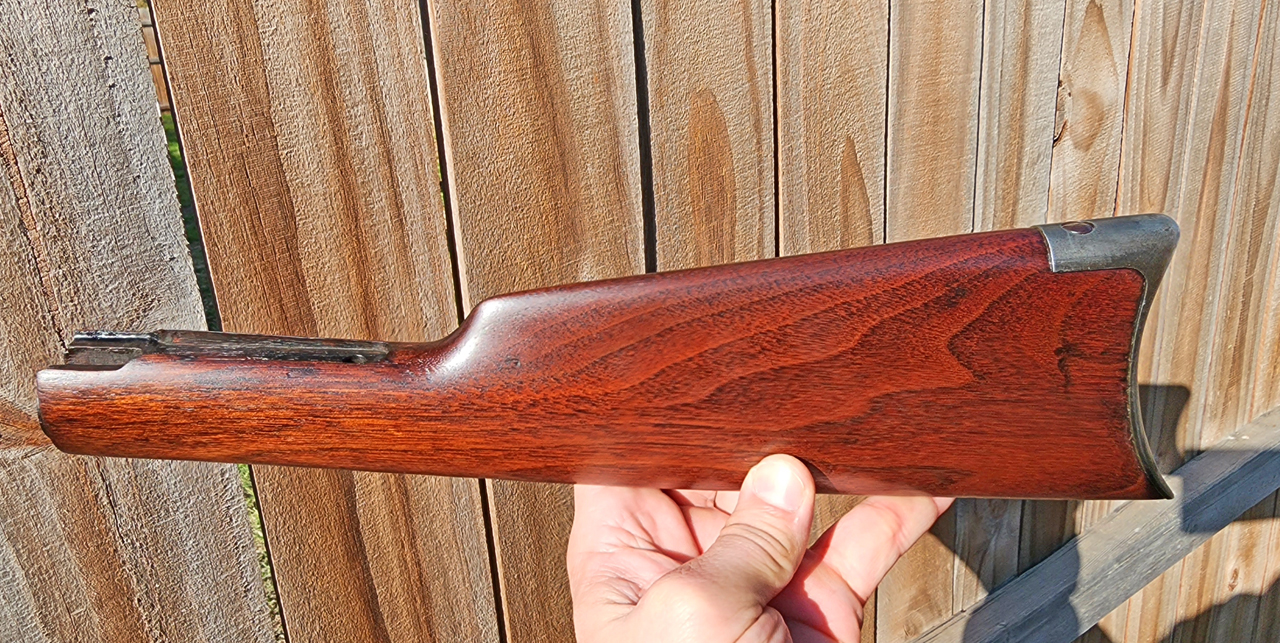
I steamed out a few dents in the stock and then gave it the same stock oil treatment. Almost to the finish line.
Got the dovetail for the tenon cut in the new barrel.
Original front sight fitted, the marble bead has a small chip I figure it just adds to the character.
Stripped the receiver and bolt down for cleaning and inspection, all checked out. I couldn't find anything that required replacement, pretty amazing for such an old gun. The extractor is still sharp and it's spring strong.
Cleaned lubed and ready to go. Action is as smooth as can be, it makes a nice sharp click when cocking the hammer back now. Trigger pull is fantastic. I did replace the hammer and pivot screws due to the slots being buggered up, I sanded some of the finish off of them so they matched the other screws.
This is the cracked piece of the forearm, the wood was very dry and probably contributed to the cracking.
I used clear epoxy to glue it back in place, it's hard as steel now. The repair is almost invisible, I treated the whole thing inside and out with Winchester Restorations stock oil.
I steamed out a few dents in the stock and then gave it the same stock oil treatment. Almost to the finish line.
Just a note concerning the baseless warnings about 38-55 brass, etc. Marlin balloon head brass was nominally 2.125”, when Winchester appropriated the cartridge their brass was nominally 2.085”, 40 thousandths shorter, but Winchester chambers were all cut to the original depth. The length of your brass really only matters if you have both long and short brass and don’t clean your rifles.
The more significant issue is that 38-55 is a true 38 caliber: .380 nominal groove diameter. That Centennial barrel most likely is a 380 barrel with a 375 chamber like the rest of the Winchester Commemorative rifles were. It’s an easy fix with a hand held reamer.
The more significant issue is that 38-55 is a true 38 caliber: .380 nominal groove diameter. That Centennial barrel most likely is a 380 barrel with a 375 chamber like the rest of the Winchester Commemorative rifles were. It’s an easy fix with a hand held reamer.
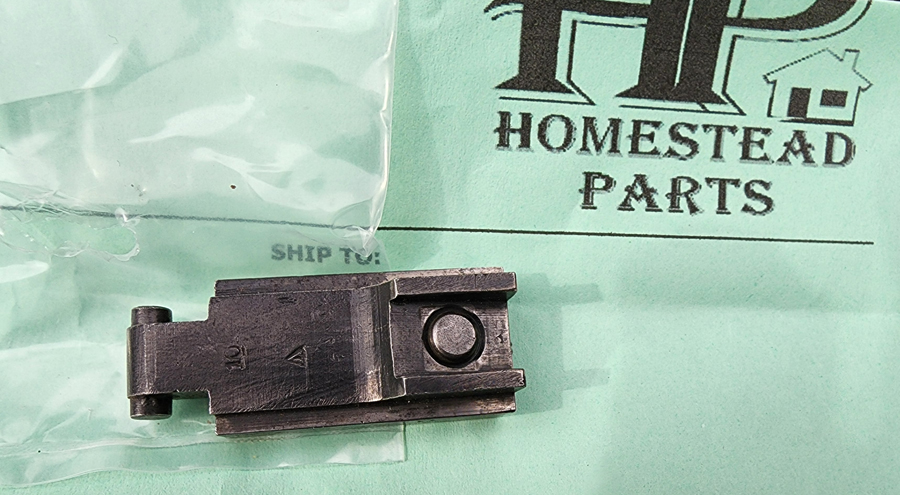
Ok folks there's going to be a delay while I wait on an oversize locking block. The original barrel head spaced well past SAMMI specs (swallowed the gauge) and the new one wound up being in field gauge territory. This is partly due to the design of the gun and isn't uncommon, that said this rifle has also seen a lot of use and abuse. Winchester used oversize locking blocks on the assembly line when one was found to be out of spec and the new part I ordered is an original Winchester part, this is the proper way to bring headspace back to spec on a Pre 64. I checked my locking block when I had it apart for oversize stampings and found that it's not an oversized block.
The 30-30 doesn't have enough pressure to cause a catastrophic failure in a gun like this but could lead to primers that push out and possible misfires. That's not just my opinion it's the opinion of those with a lot more knowledge than I, lots of research was done before I started this project so this headspace issue came as no surprise. In fact, I was going to ignore it being on the field gauge but I want this project done correctly so I'm waiting on Home Stead to ship out the new block.
Oversize locking blocks were made in sizes .005 - .015 by Winchester and can still be found, you simply replace the current block with the new one. Some filing may be required if it's too tight, I don't think I'll need to do that in my case as I measured for it. The barrel will be going out for engraving on Saturday, full steam ahead!

I think this project falls somewhere in here. My rifle isn't rare and not in the best cosmetic shape, it was literally being used as a decoration, I think I'm doing it justice. I could always return it back to original by installing the old non functional barrel back on it.
The 30-30 doesn't have enough pressure to cause a catastrophic failure in a gun like this but could lead to primers that push out and possible misfires. That's not just my opinion it's the opinion of those with a lot more knowledge than I, lots of research was done before I started this project so this headspace issue came as no surprise. In fact, I was going to ignore it being on the field gauge but I want this project done correctly so I'm waiting on Home Stead to ship out the new block.
Oversize locking blocks were made in sizes .005 - .015 by Winchester and can still be found, you simply replace the current block with the new one. Some filing may be required if it's too tight, I don't think I'll need to do that in my case as I measured for it. The barrel will be going out for engraving on Saturday, full steam ahead!
I think this project falls somewhere in here. My rifle isn't rare and not in the best cosmetic shape, it was literally being used as a decoration, I think I'm doing it justice. I could always return it back to original by installing the old non functional barrel back on it.
Dropped the barrel off for engraving today and also received the oversize locking block. No more headspace problem.
Just need to wait on the engraving and then it's down to the rust blue finish and weathering. The block was pulled from a factory gun already oversized, and since it's as old as my 94 no weathering required for the finish.
Just need to wait on the engraving and then it's down to the rust blue finish and weathering. The block was pulled from a factory gun already oversized, and since it's as old as my 94 no weathering required for the finish.
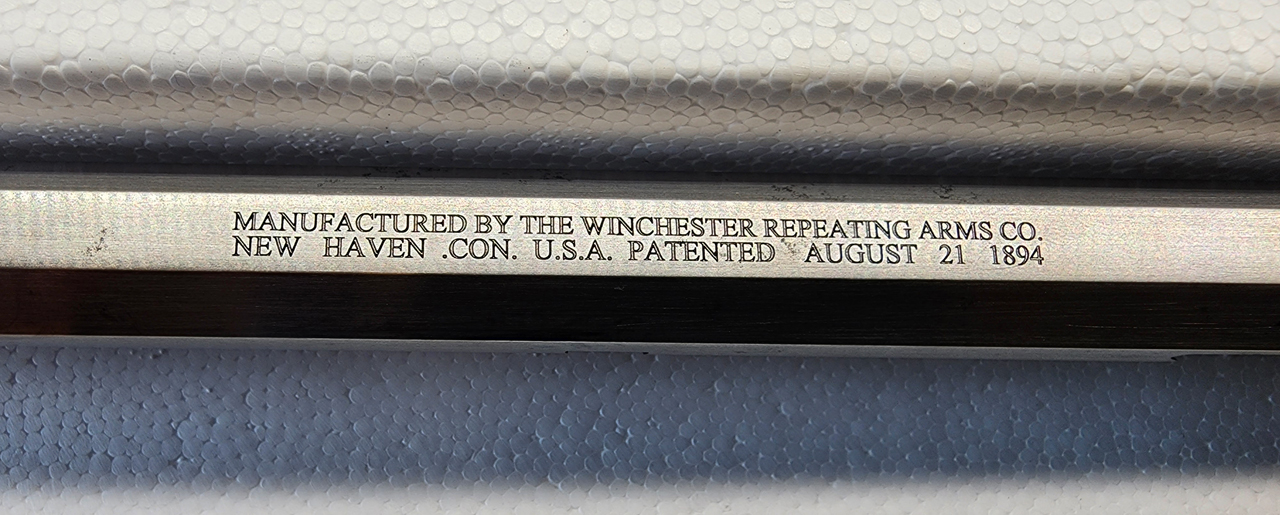
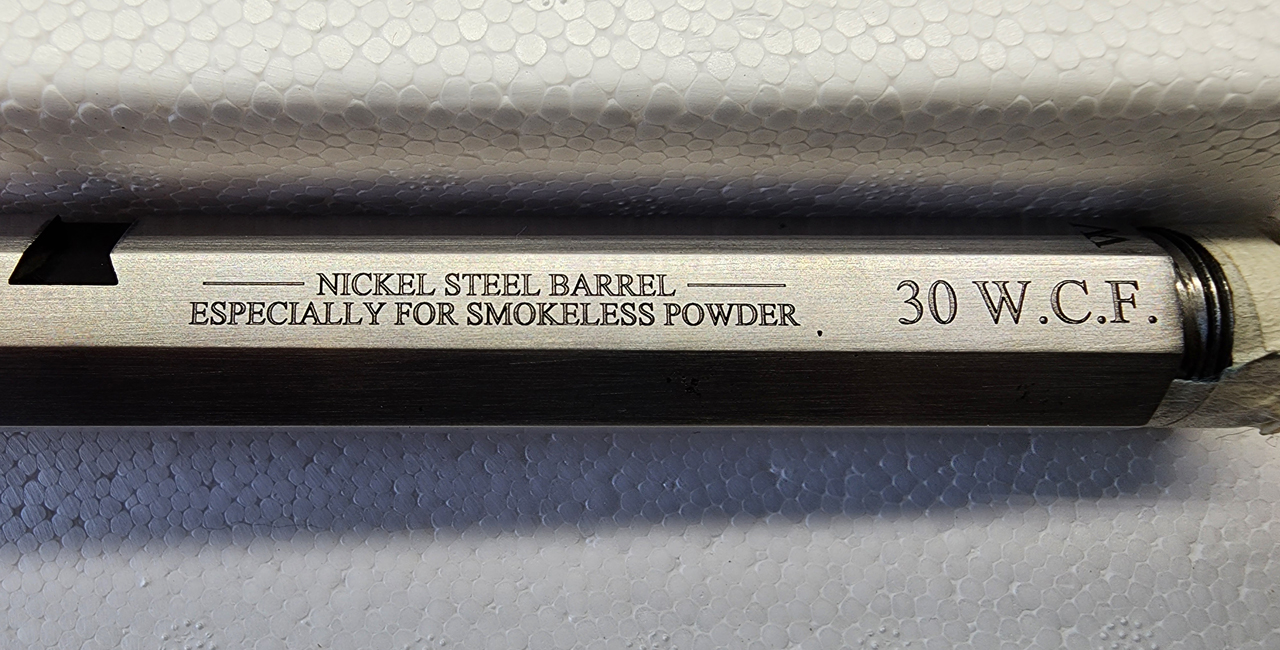
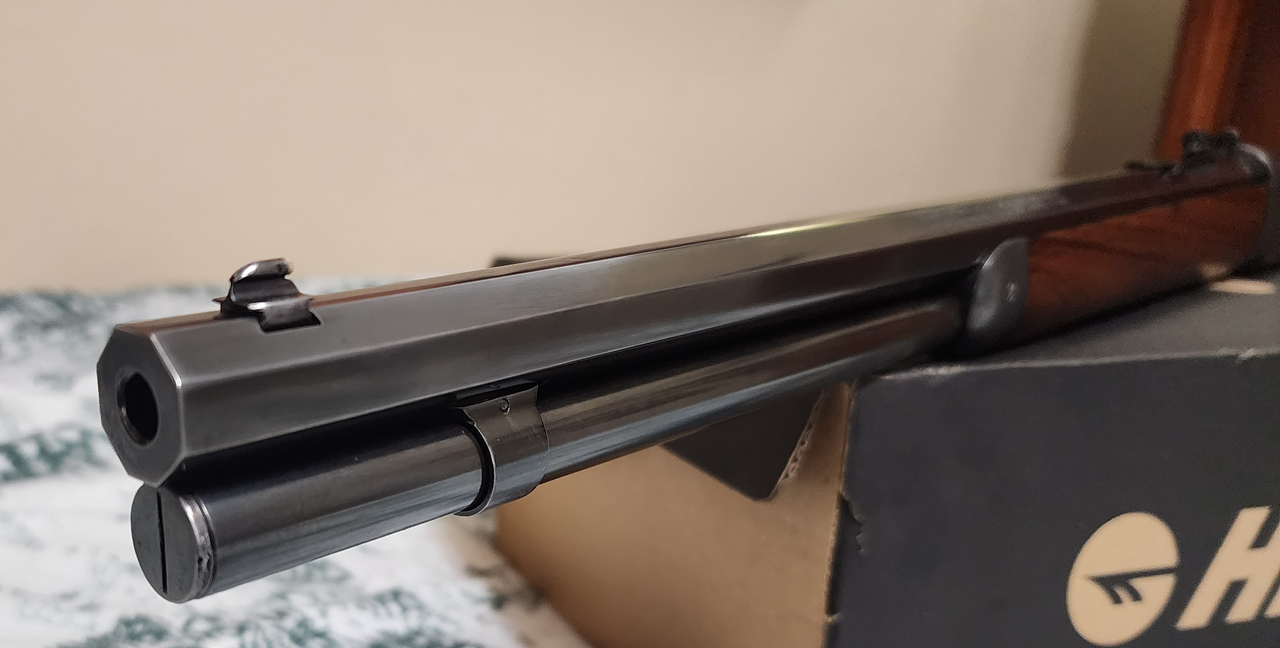
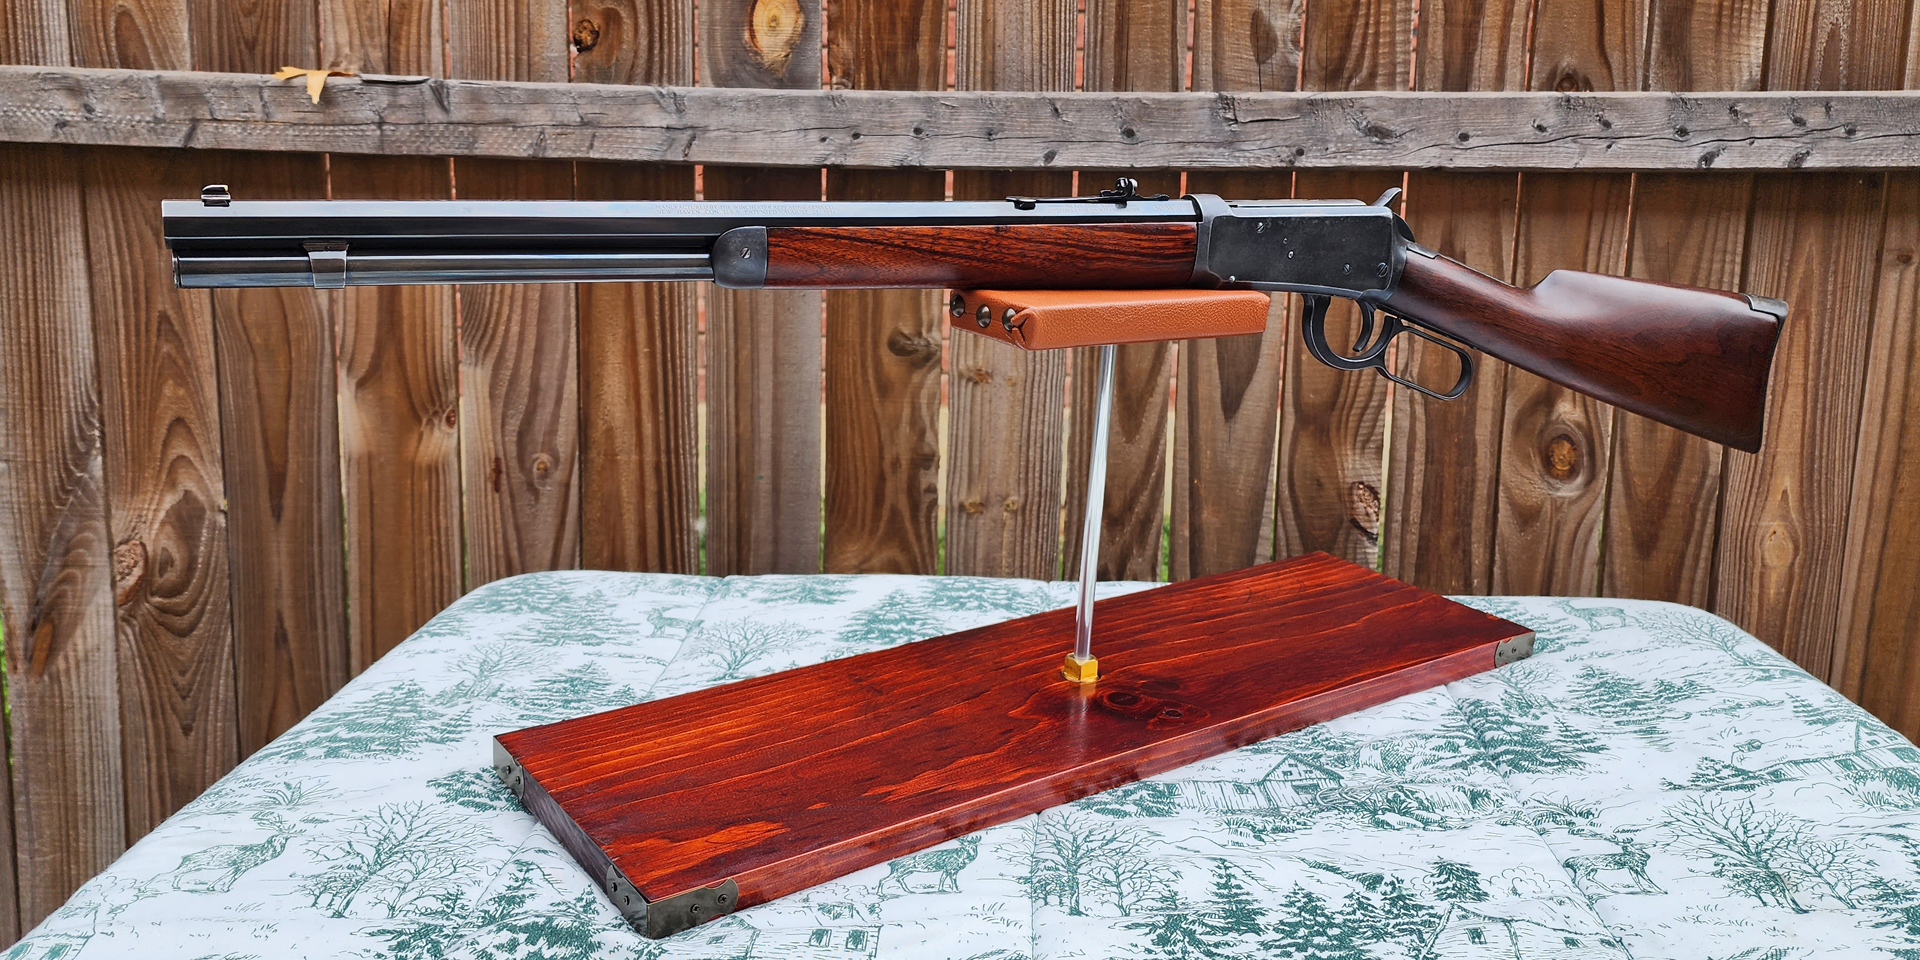
Just picked up the barrel from engraving, the dude killed it!
The spacing is identical to the original barrel roll marks. As I'm not trying to create a counterfeit I had the font scaled up slightly larger and instead of the Winchester proof mark at the top of the barrel I had a simple W engraved in it's place. I may end up removing all of the pitting as it turned out better than expected, I was going to leave some for the aged look, trying to make up my mind.
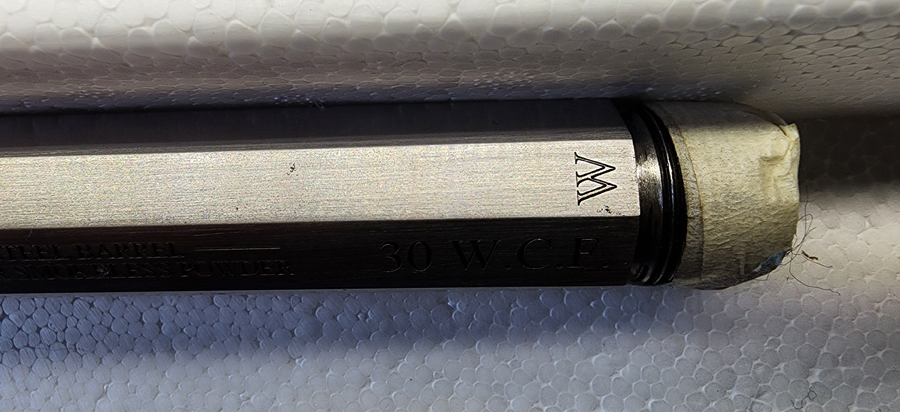

The spacing is identical to the original barrel roll marks. As I'm not trying to create a counterfeit I had the font scaled up slightly larger and instead of the Winchester proof mark at the top of the barrel I had a simple W engraved in it's place. I may end up removing all of the pitting as it turned out better than expected, I was going to leave some for the aged look, trying to make up my mind.
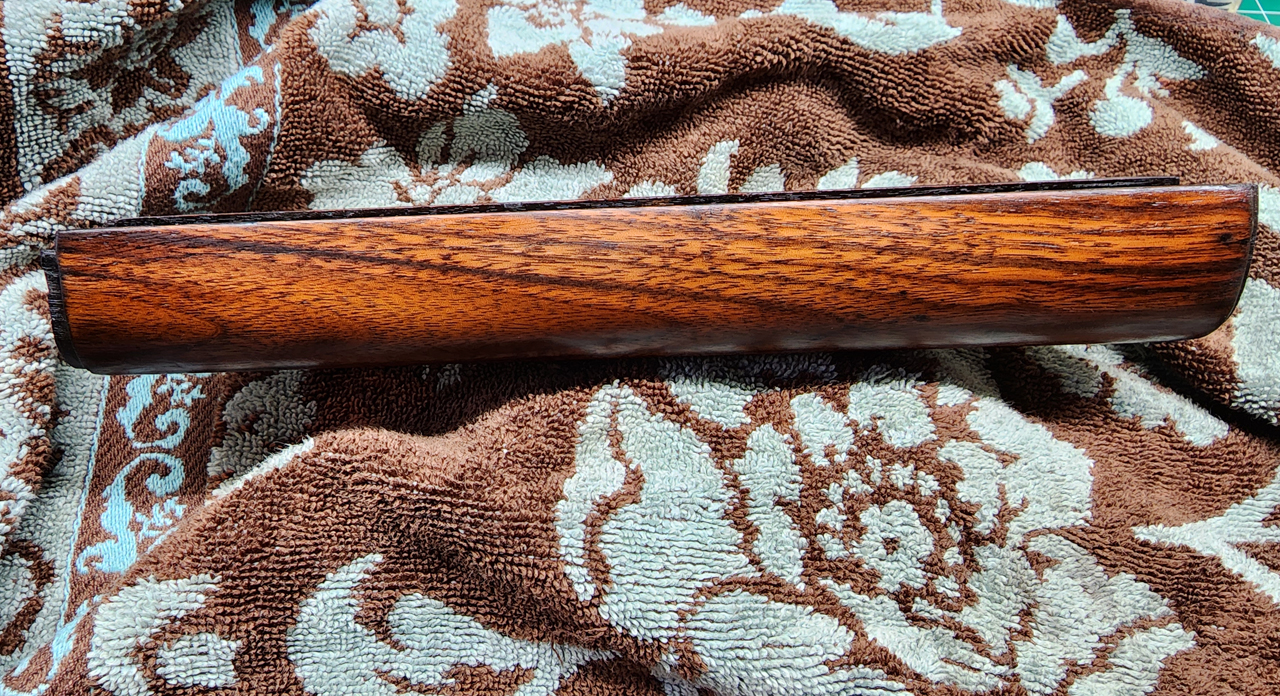
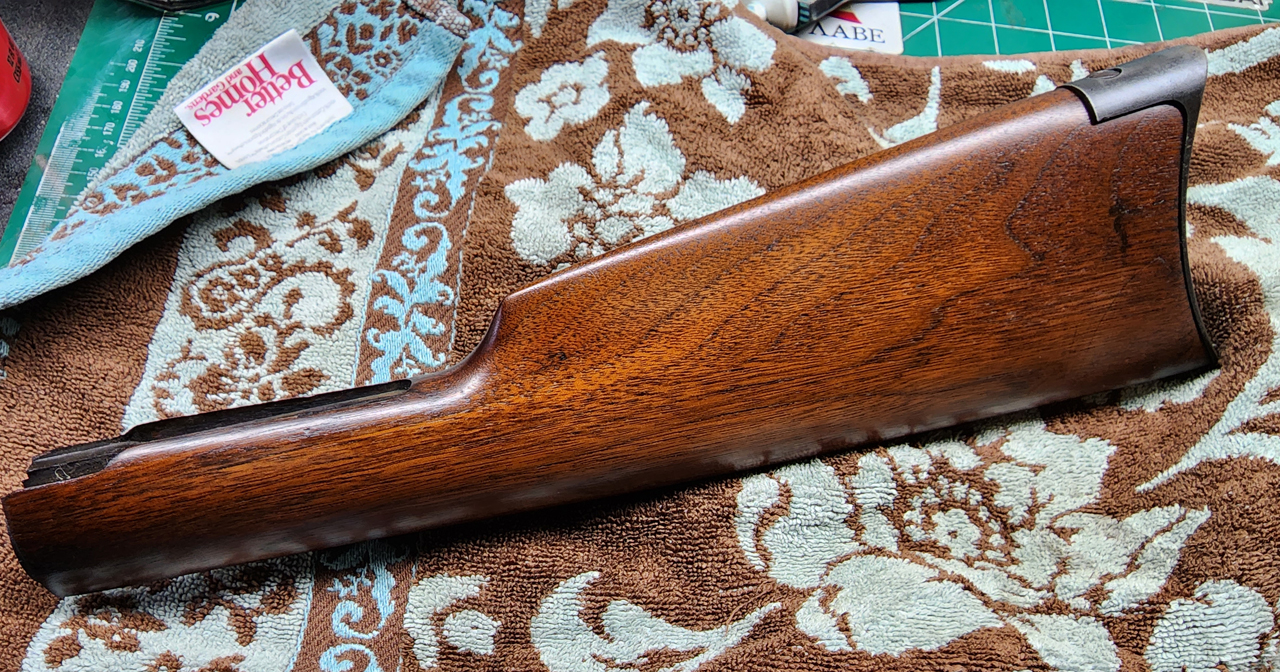
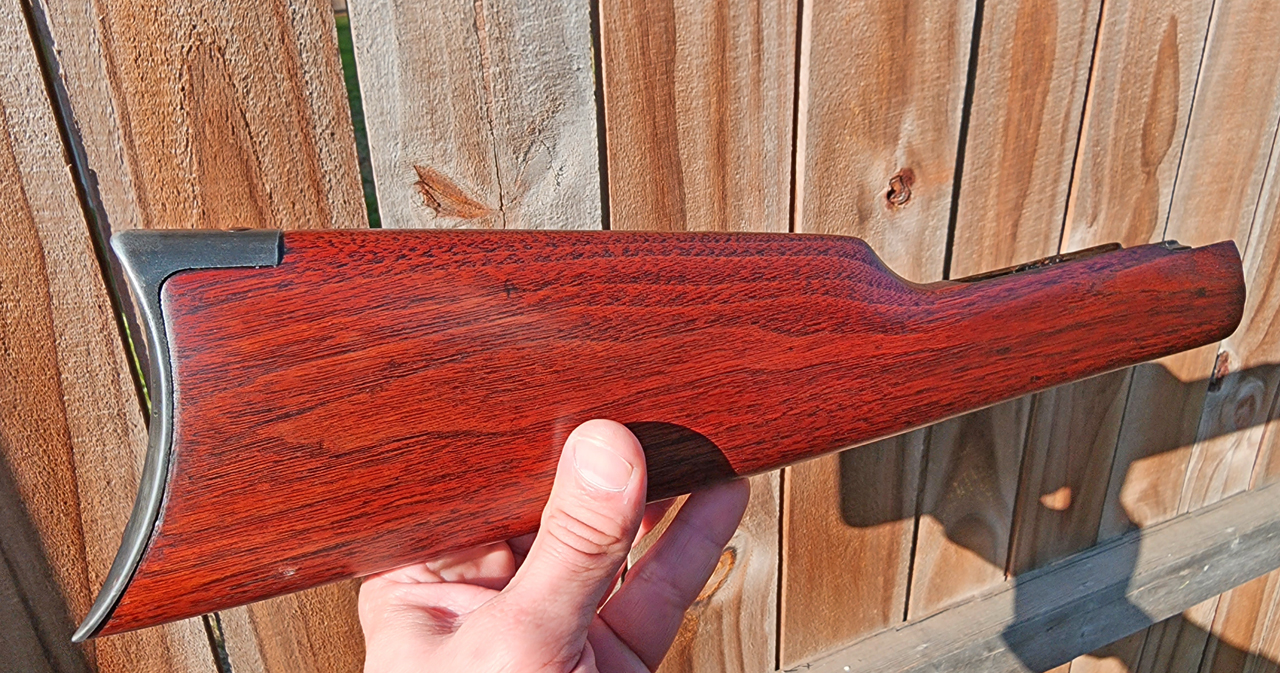
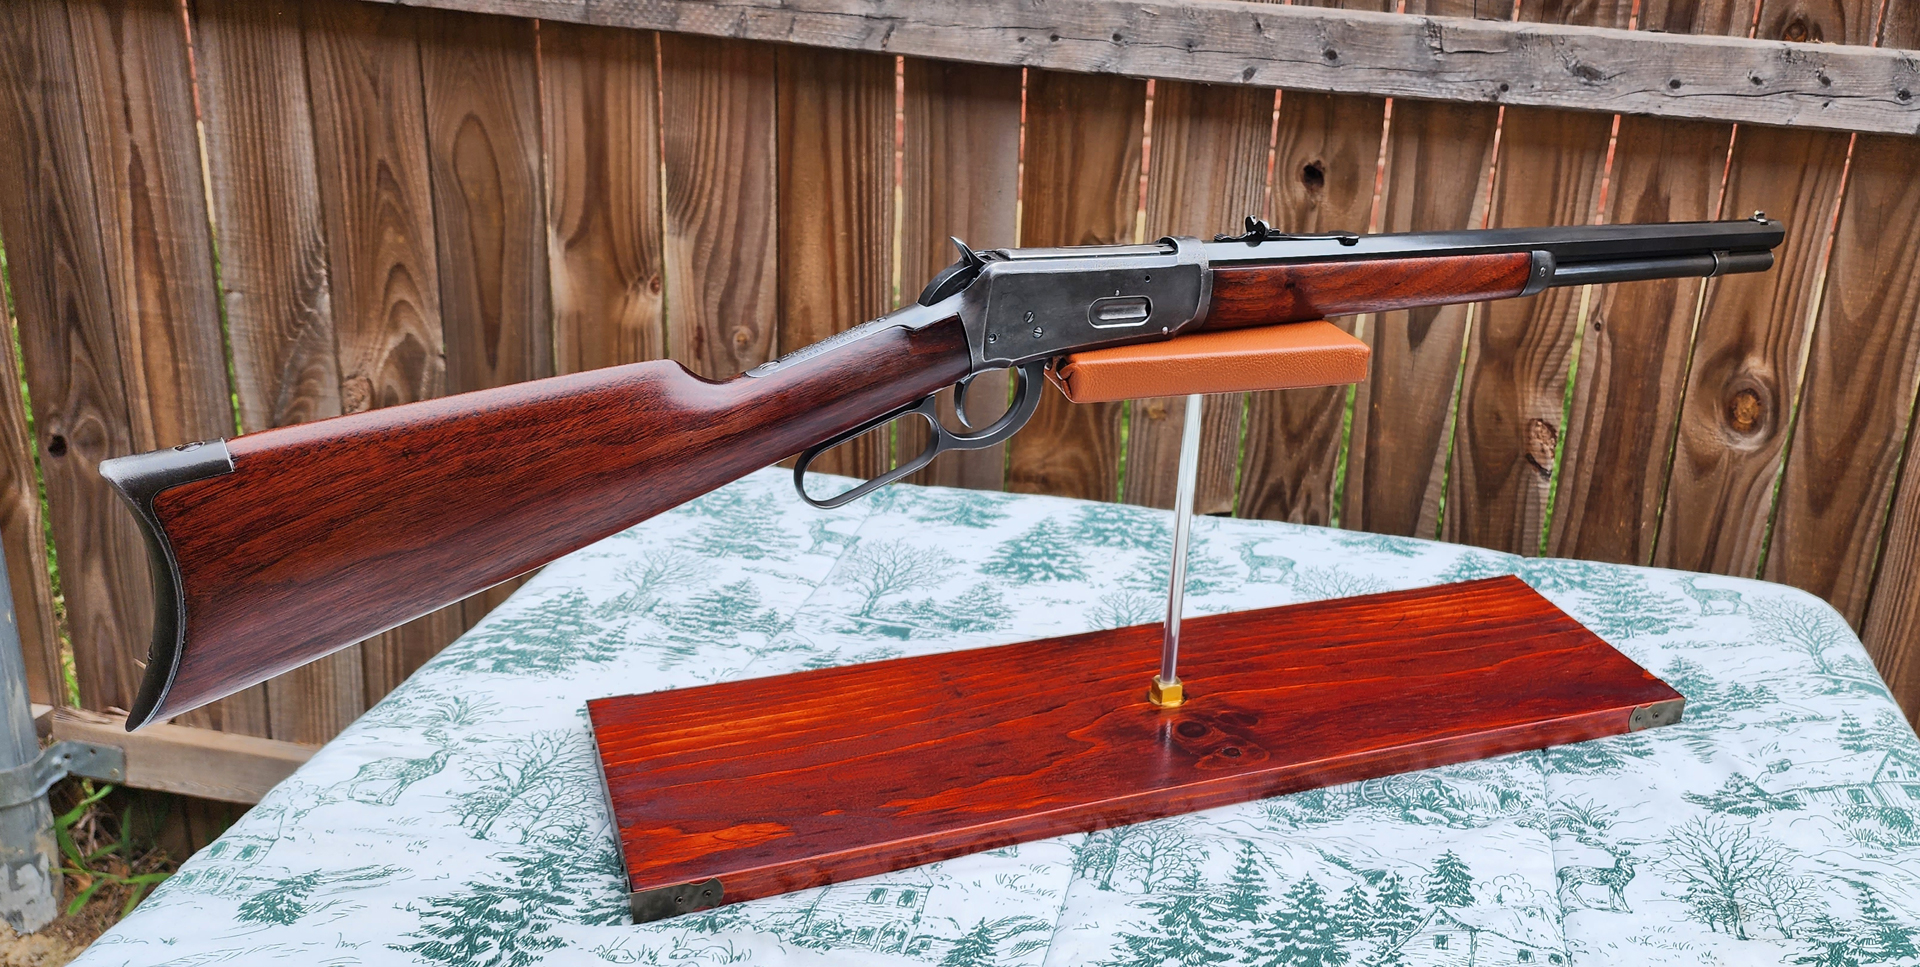
I also refinished the stock while I was waiting on the barrel to come back from engraving. I used citrus stripper to remove the clear coat while retaining as much of the original walnut stain as possible. All dents have been steamed out and the scratches removed. I left the aged shrinkage around the corners and the natural discoloration. Once I had it smooth I gave it a light coat of walnut stain and then sanded and hand rubbed Winchester restorations stock oil into the grain. I gave it one final heavy coat of the Winchester stock oil and then allowed it to dry 24 hours. I followed this up with repeated coats of Timber Luxe all rubbed in by hand over several weeks. There's no clear coat, just a nice natural bees wax to protect it from the weather. Before the stock was extremely dried out, the oils should keep it moisturized now so hopefully it won't crack or chip anymore.
This is where the repair was made to the fore end, you can just see a horizontal line where the repair was made, most probably won't even know it was there. I got really lucky on this repair as no wood was missing.
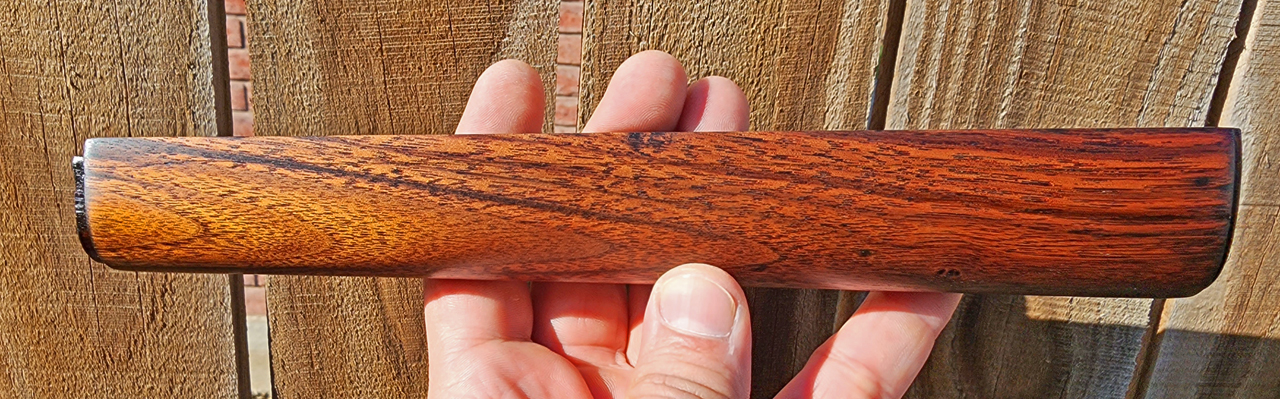

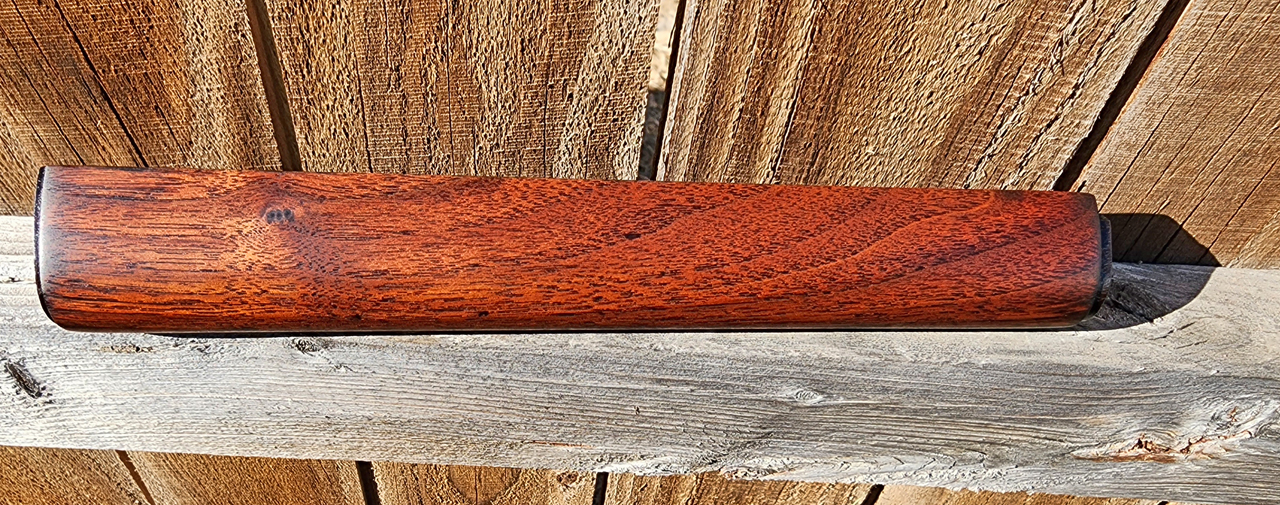
This is where the repair was made to the fore end, you can just see a horizontal line where the repair was made, most probably won't even know it was there. I got really lucky on this repair as no wood was missing.
Now I'm just waiting on a boil tank for the rust blue and a couple of other pieces. It should all come together soon.
I didn't want to pay for an expensive pro gunsmith tank so I ordered this 22" cooking pan for the boiling. I'm going to use my BBQ grill for heating the water.
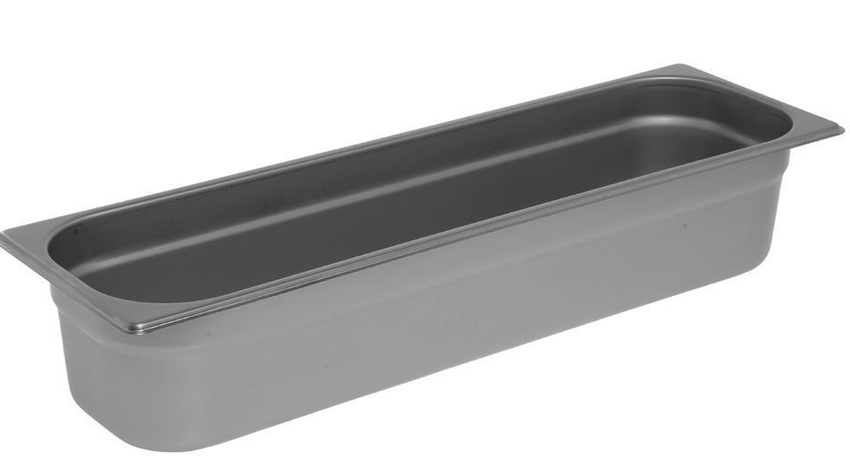
I've already got a gunsmiths soft carding wheel and the rust blue formula. My system may be unconventional but It should work. Famous last words!

I didn't want to pay for an expensive pro gunsmith tank so I ordered this 22" cooking pan for the boiling. I'm going to use my BBQ grill for heating the water.
I've already got a gunsmiths soft carding wheel and the rust blue formula. My system may be unconventional but It should work. Famous last words!
Last edited:
First rust blue attempt, man what a pain in the arse! It does work though and it's allowing me to recreate a worn aged look.
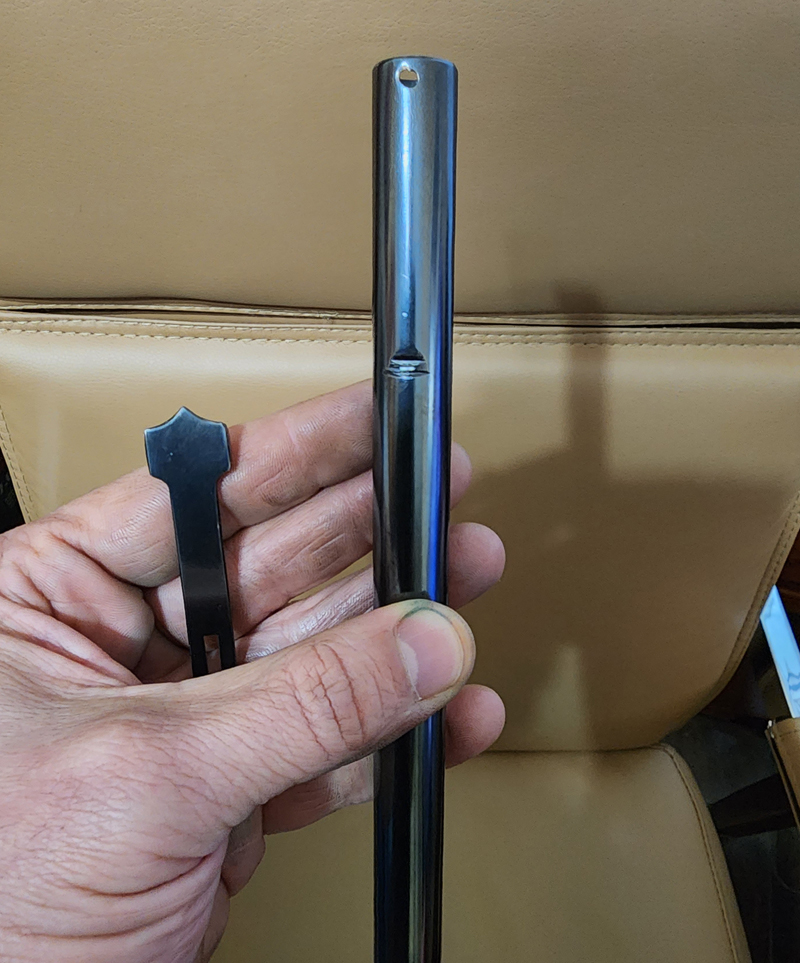
The mag tube was in the white when I started. Note the spotty rust near the tip, normally you would remove this and start over. In my case I want it to look old and worn so I'm leaving it.
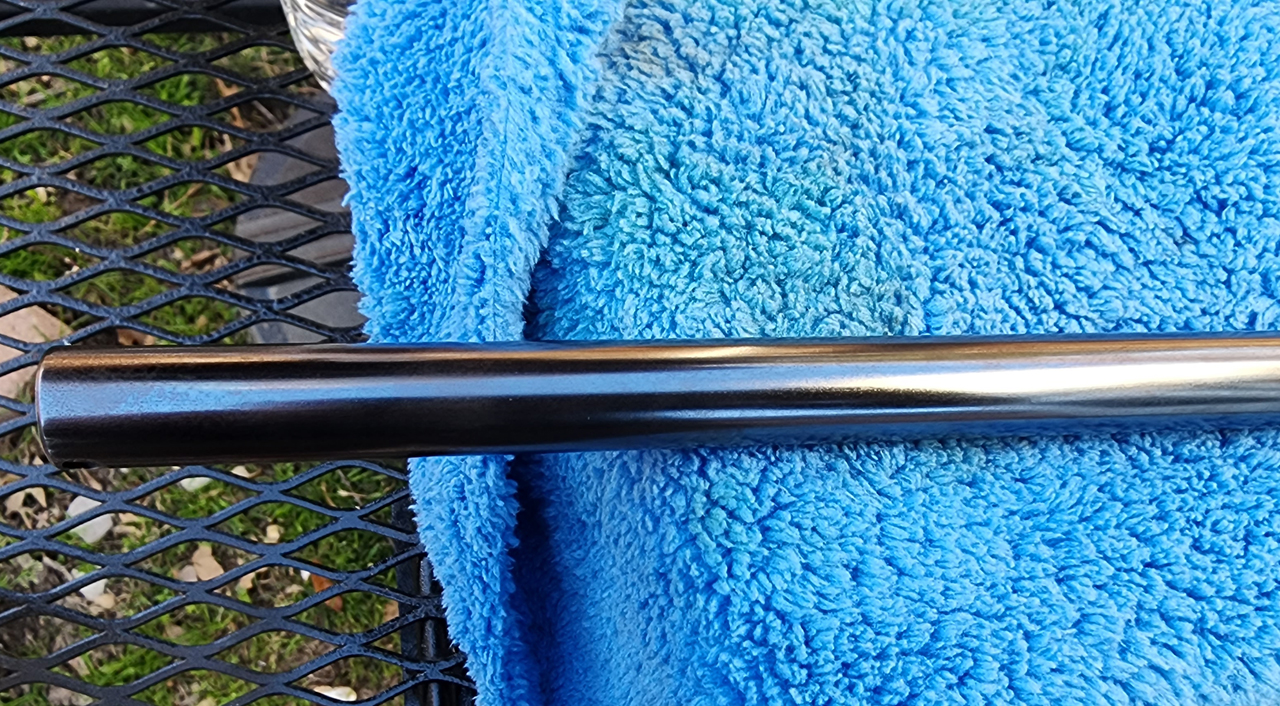
My carding wheel was finer than I wanted so it's making the parts shiny instead of flat, I can live with it. It's comparable to the untouched sight in this photo.
Next to the original beat up rusty mag tube.
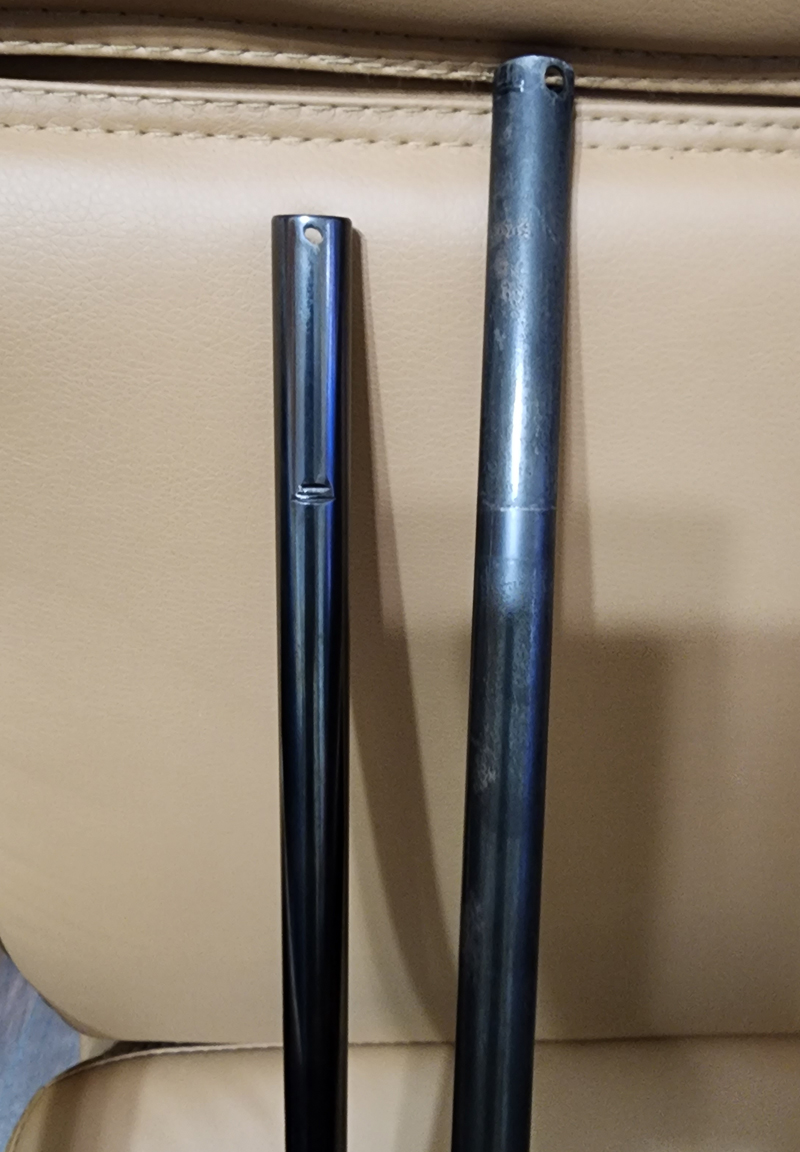
The mag tube was in the white when I started. Note the spotty rust near the tip, normally you would remove this and start over. In my case I want it to look old and worn so I'm leaving it.
My carding wheel was finer than I wanted so it's making the parts shiny instead of flat, I can live with it. It's comparable to the untouched sight in this photo.
Next to the original beat up rusty mag tube.
Here's a little peak at the progress, it's down to just a few items now. There's a small chip on the right side of the stock that I was going to ignore that I've decided to fix now and a couple of parts to see if I could tighten the action up a little more. Waiting on delivery of these items.
Question: Why the hell aren't you finished with this thing yet?
Answer: I'm working on it!
Ok, just when I thought I was finished I ran into another issue with headspace. I previously mentioned that I addressed this problem with an oversize locking block and I thought I had. I partially fitted it and assumed I would be in the clear once I had it all the way fitted, well that didn't turn out. Once again it failed to headspace and now I know why.
It's a know fact that you can correct for excessive headspace on the pre 64 1894 by adding an oversize locking block. Lots of wear can occur on very old and worn guns at the rear of the bolt from the locking block moving against the rear of the bolt. My rifle had this condition, the bolt was loose. However, there is another place that excessive headspace can occur as well and that's on the bolt face itself. I failed to check here and that wound up being yet another issue. My bolt is worn at both ends, it's toast just like the original barrel was.
So now the problem. They don't make new bolts for a pre 64, and finding one in good shape is not easy. Post 64 bolts are not compatible. Over the past month I've looked at dozens and most of them were as worn if not more worn than the one I already have. After lots of looking and asking the sellers questions I settled on three candidates.
Of the three I ordered I returned one as it wound up being too worn, the seller was kind enough to let me return it. The second bolt appeared to have had it's face welded over to build up material and then machined, this bolt would have worked perfectly except that they had broken off the ejector mounting tab likely during the machining process. This further proves to me that worn bolt faces are a problem on these old guns. I've been unable to get in contact with the seller on this bolt so I likely have a sixty dollar paperweight. The third one was the charm, it's from a newer model probably 1940's-1960's as it has the smaller cut out on top of the bolt. The problem is now solved.
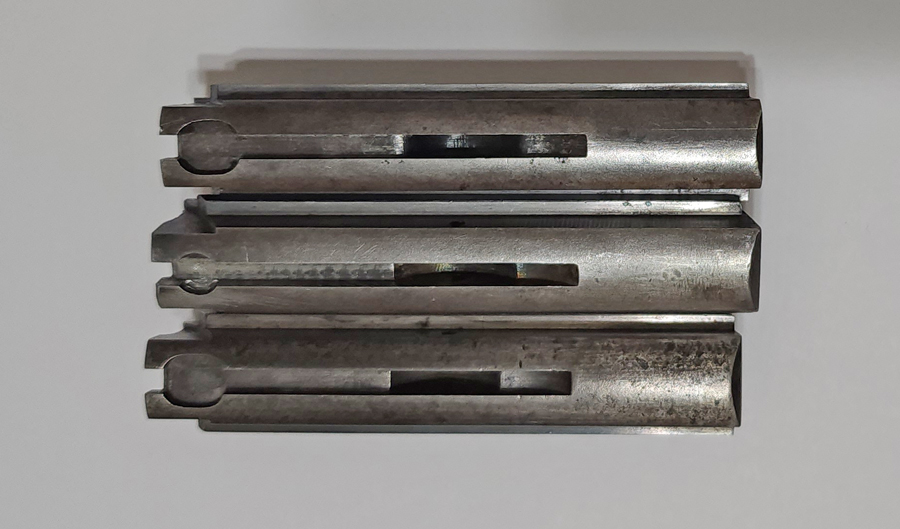
The three candidates. These bolts fit all rifle calibers that were offered for the Model 1894, 30 W.C.F. 38-55 etc.
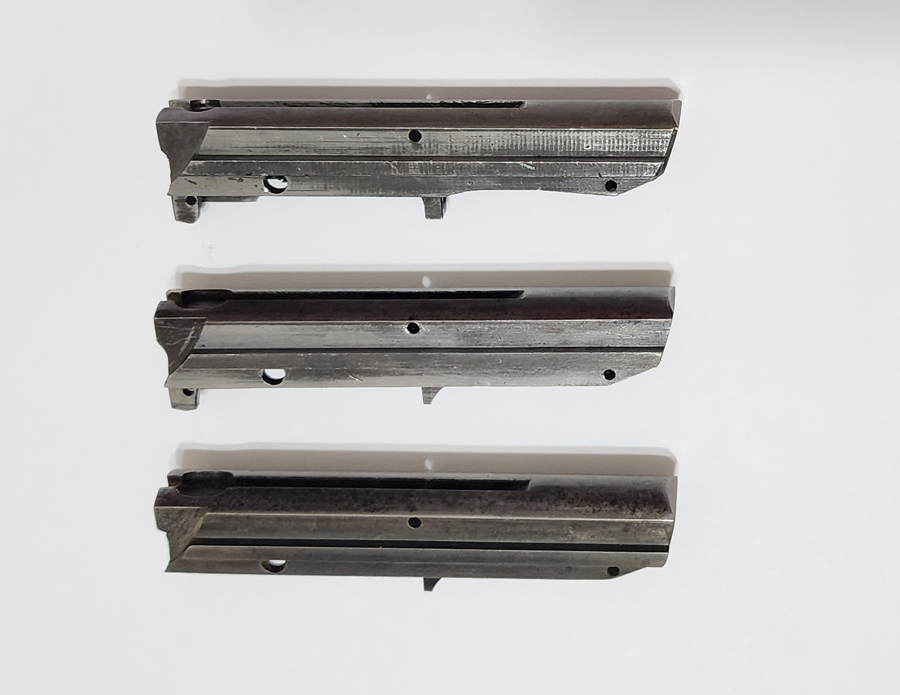
Here are the bolt faces, the one in the middle is the good one. If you look at the one on the outer left you can see that the face is sort of squished outward. The one on the far right is the one that was welded and machined, unfortunately the ejector stud is broken off.

The small hole at the top is the only difference between the newer made bolts and the older ones. I might have it machined out to match the old one later on, for now I'm going with it.
None of the bolts I tried will drop right in, I already knew this though. The bolt must be hand fit to the rifle it's to be used in and must remain with that rifle. To do this you need the cartridge you'll be using or a go gauge in that caliber, and also a no-go gauge. I'm using a case that had it's neck removed, this is ok as you only need the rim of the case to complete the fitting process. Edit: Also the bolt must be stripped of the ejector and extractor.

Place the cartridge in the chamber and insert the bolt making sure the cartridge is fully seated against the bolt face. Try to insert the locking block, if it wont move up to the top of the receiver then you must remove material from the rear of the bolt. Do this very slowly checking each time, I coated the rear of the bolt with Dykem to ensure that I was evenly removing material and that the angle of the bolt stayed the same. I don't have access to a machine shop so I just used a straight edge and some 180 grit sand paper and carefully sanded until it fit. A slow process by hand, but gets the job done just the same.
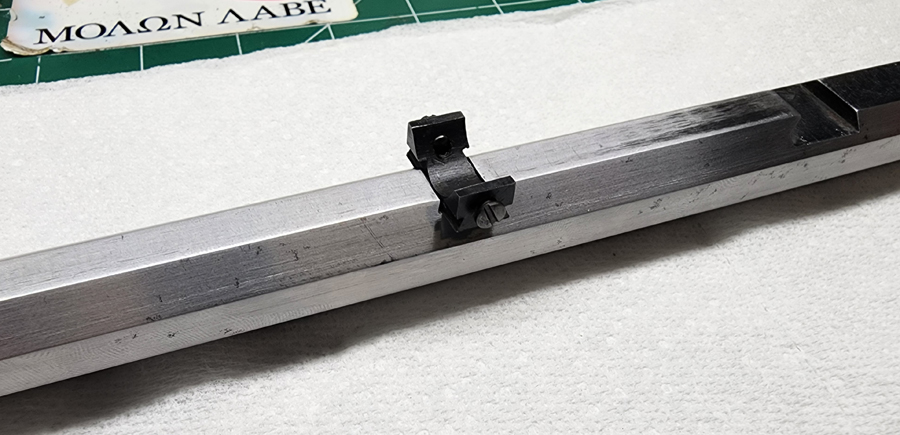
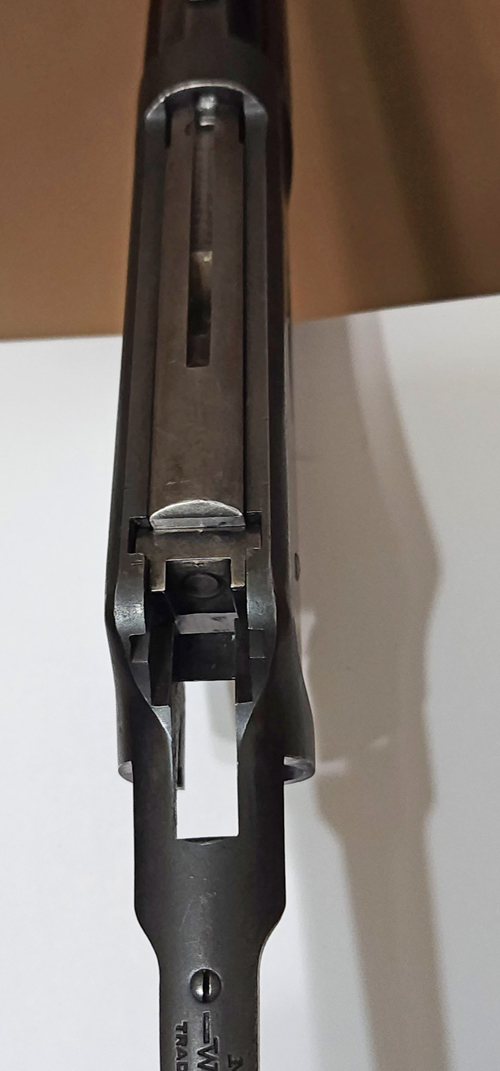
This shows correct fitment of the bolt against the locking block with a chambered cartridge. There's zero movement of the bolt or locking block at this point.
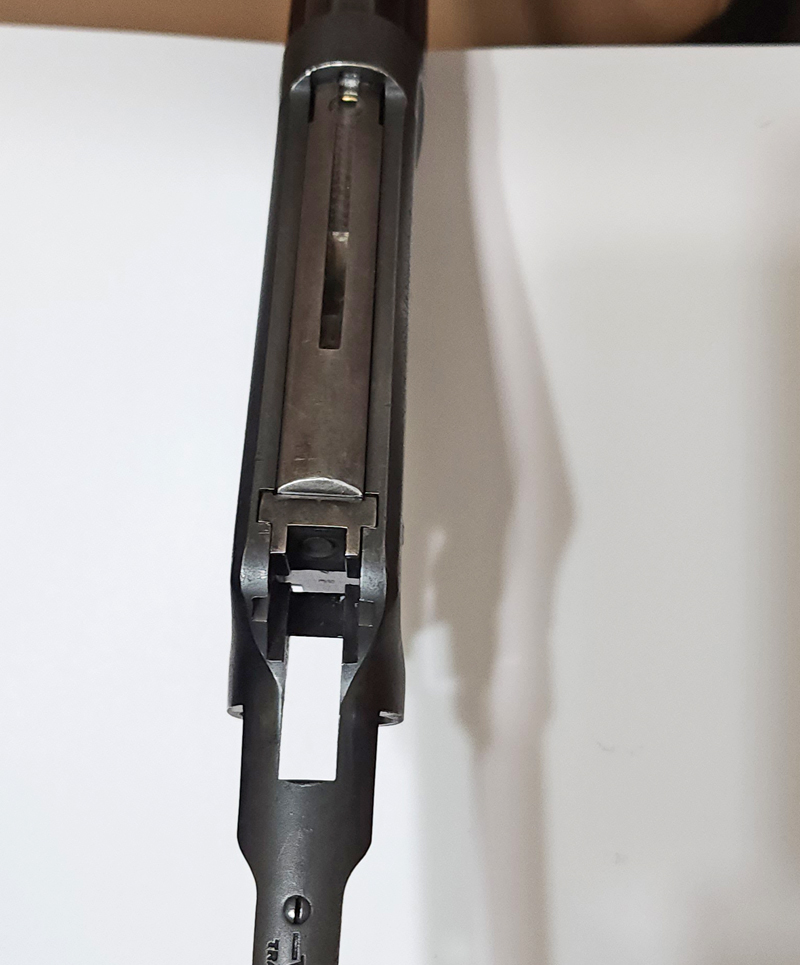
And now checking for excessive head space with a Clymer no go gauge. The locking block is unable to close no matter how hard I try to force it.
Answer: I'm working on it!
Ok, just when I thought I was finished I ran into another issue with headspace. I previously mentioned that I addressed this problem with an oversize locking block and I thought I had. I partially fitted it and assumed I would be in the clear once I had it all the way fitted, well that didn't turn out. Once again it failed to headspace and now I know why.
It's a know fact that you can correct for excessive headspace on the pre 64 1894 by adding an oversize locking block. Lots of wear can occur on very old and worn guns at the rear of the bolt from the locking block moving against the rear of the bolt. My rifle had this condition, the bolt was loose. However, there is another place that excessive headspace can occur as well and that's on the bolt face itself. I failed to check here and that wound up being yet another issue. My bolt is worn at both ends, it's toast just like the original barrel was.
So now the problem. They don't make new bolts for a pre 64, and finding one in good shape is not easy. Post 64 bolts are not compatible. Over the past month I've looked at dozens and most of them were as worn if not more worn than the one I already have. After lots of looking and asking the sellers questions I settled on three candidates.
Of the three I ordered I returned one as it wound up being too worn, the seller was kind enough to let me return it. The second bolt appeared to have had it's face welded over to build up material and then machined, this bolt would have worked perfectly except that they had broken off the ejector mounting tab likely during the machining process. This further proves to me that worn bolt faces are a problem on these old guns. I've been unable to get in contact with the seller on this bolt so I likely have a sixty dollar paperweight. The third one was the charm, it's from a newer model probably 1940's-1960's as it has the smaller cut out on top of the bolt. The problem is now solved.
The three candidates. These bolts fit all rifle calibers that were offered for the Model 1894, 30 W.C.F. 38-55 etc.
Here are the bolt faces, the one in the middle is the good one. If you look at the one on the outer left you can see that the face is sort of squished outward. The one on the far right is the one that was welded and machined, unfortunately the ejector stud is broken off.
The small hole at the top is the only difference between the newer made bolts and the older ones. I might have it machined out to match the old one later on, for now I'm going with it.
None of the bolts I tried will drop right in, I already knew this though. The bolt must be hand fit to the rifle it's to be used in and must remain with that rifle. To do this you need the cartridge you'll be using or a go gauge in that caliber, and also a no-go gauge. I'm using a case that had it's neck removed, this is ok as you only need the rim of the case to complete the fitting process. Edit: Also the bolt must be stripped of the ejector and extractor.
Place the cartridge in the chamber and insert the bolt making sure the cartridge is fully seated against the bolt face. Try to insert the locking block, if it wont move up to the top of the receiver then you must remove material from the rear of the bolt. Do this very slowly checking each time, I coated the rear of the bolt with Dykem to ensure that I was evenly removing material and that the angle of the bolt stayed the same. I don't have access to a machine shop so I just used a straight edge and some 180 grit sand paper and carefully sanded until it fit. A slow process by hand, but gets the job done just the same.
This shows correct fitment of the bolt against the locking block with a chambered cartridge. There's zero movement of the bolt or locking block at this point.
And now checking for excessive head space with a Clymer no go gauge. The locking block is unable to close no matter how hard I try to force it.
Last edited:
Now that the bolt issue is solved I'm just finishing up some cosmetic stuff I didn't like. Once that's done I'll finally be ready to shoot the thing. Currently waiting on Brownell's to ship me some more rust bluing solution.


Members online
- Texas21
- TexasFlash
- Andrew2580
- alterspaces
- no2gates
- Mowingmaniac 24/7
- Dakar34
- ZX9RCAM
- cwmoss
- kbaxter60
- Target Sports USA
- Speed42
- jetcycles
- brashears9567
- G O B
- Texasgordo
- Hoji
- leVieux
- recoveringyankee
- TicToc26
- retiredboomer
- Steve In Texas
- prisondoc
- toddnjoyce
- ULEWZ
- sanspeu1r
- 1911'S 4 Me
- or.slacker
- txraised214
- striker55
- motorcarman
- crystalphoto
- cycleguy2300
- Dennys101
- Gorp2007
- TEXAS "All or nothing"
- PoolBoy22
- Txhighlander
- glenbo
- Rhino
- TheCanadianOne
- rl96ss
- wakosama
- cjstrauss
- Pachucko
- echo1
- ggiovanni
- Blktoothgrn
- Mescobarrpls
- toby1
Total: 1,212 (members: 89, guests: 1,123)
