New project bike

The #1 community for Gun Owners in Texas

Member Benefits:

  • Fewer Ads!
  • Discuss all aspects of firearm ownership
  • Discuss anti-gun legislation
  • Buy, sell, and trade in the classified section
  • Chat with Local gun shops, ranges, trainers & other businesses
  • Discover free outdoor shooting areas
  • View up to date on firearm-related events
  • Share photos & video with other members
  • ...and so much more!
  • OutlawStar

    Active Member
    Rating - 100%
    4   0   0
    Sep 14, 2017
    926
    76
    NorTex
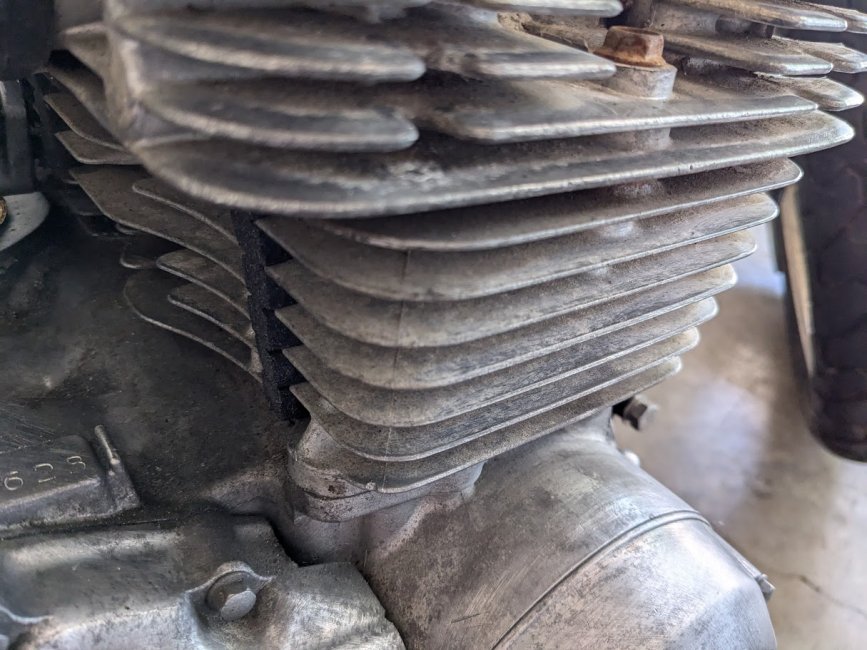
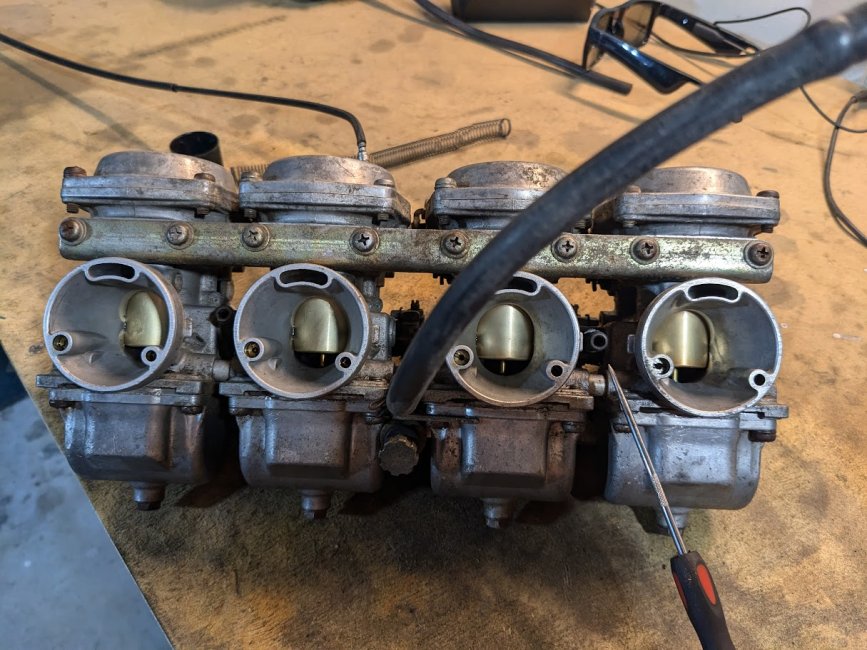
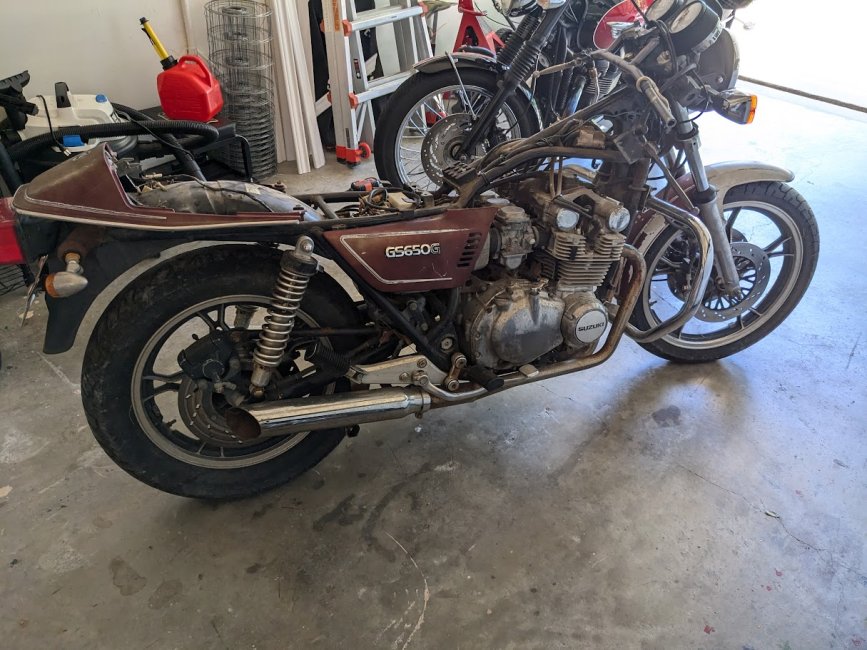
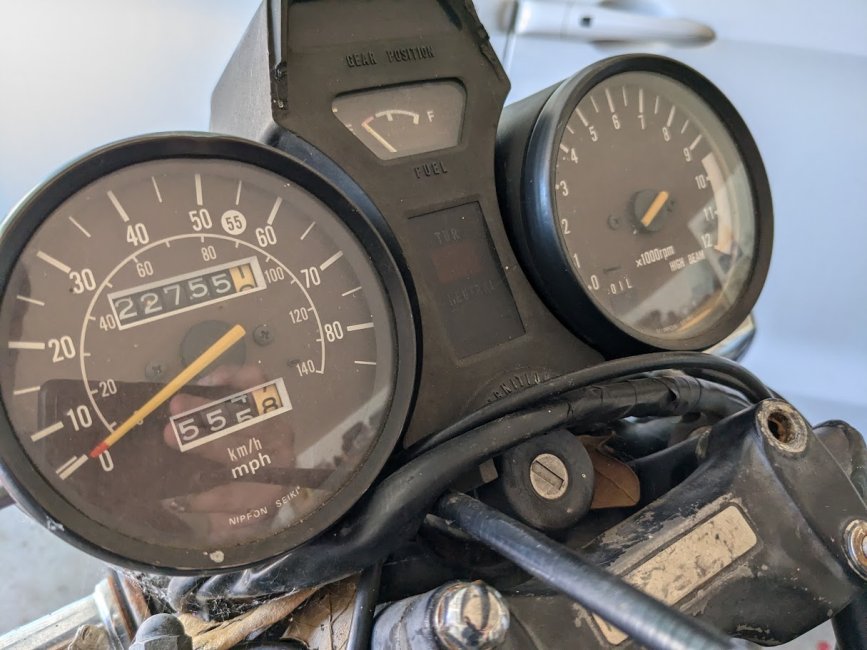
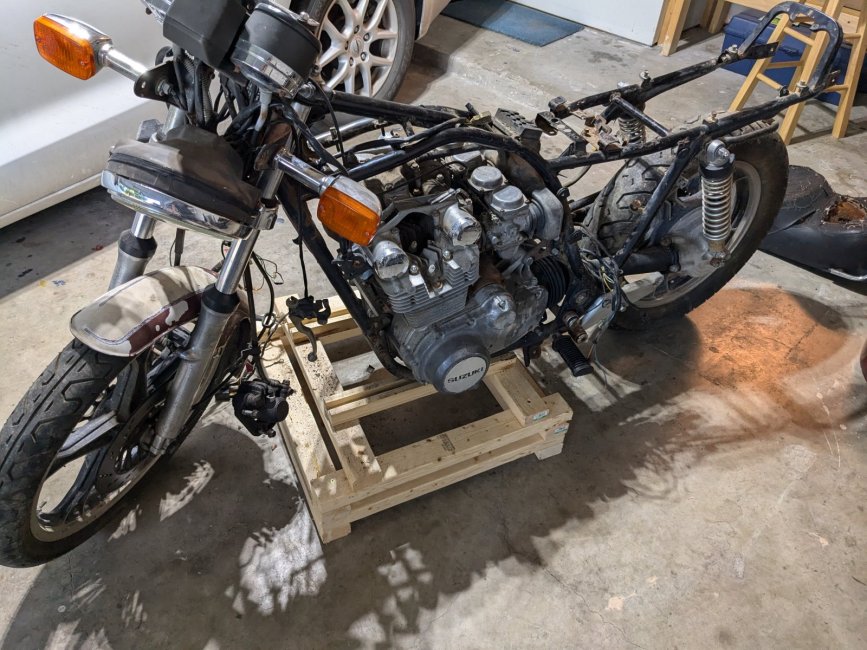
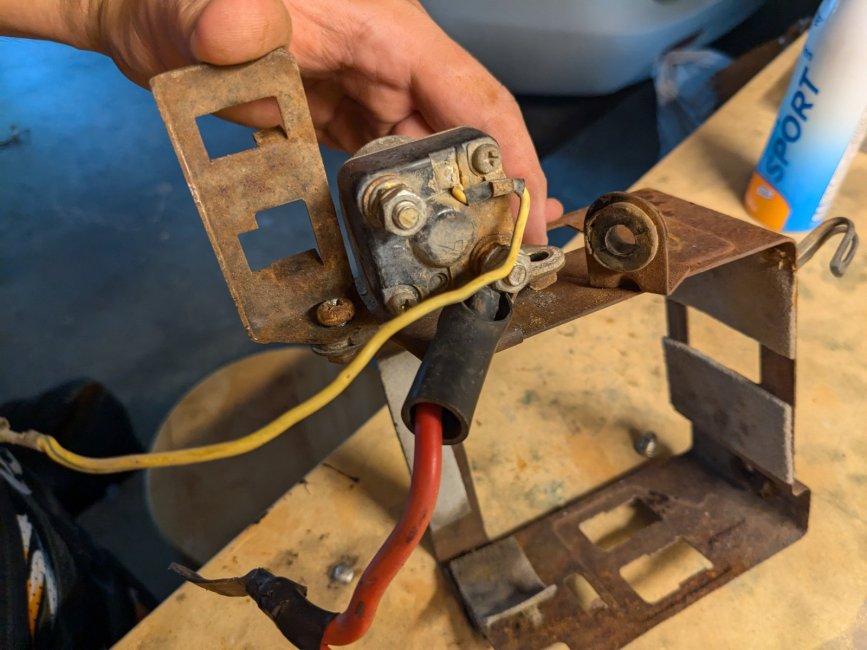
    Fellas, found another bike I only have a little regret over getting. No title, no keys, unknown when last running. I didn't even hook a battery up to it. No bars, no controls, but it looks like the rest of it is "still there". Seat is trashed, tires still hold air, and the engine still has amber colored oil in it. Appears to be completely surface rusted (and mice peed on it) even the thin sheet metal stuff around the battery box is still decent. I'm going to de-rust those tonight and rattle can them. Gas tank has a giant rust hole in it too, so thats unfortunate.

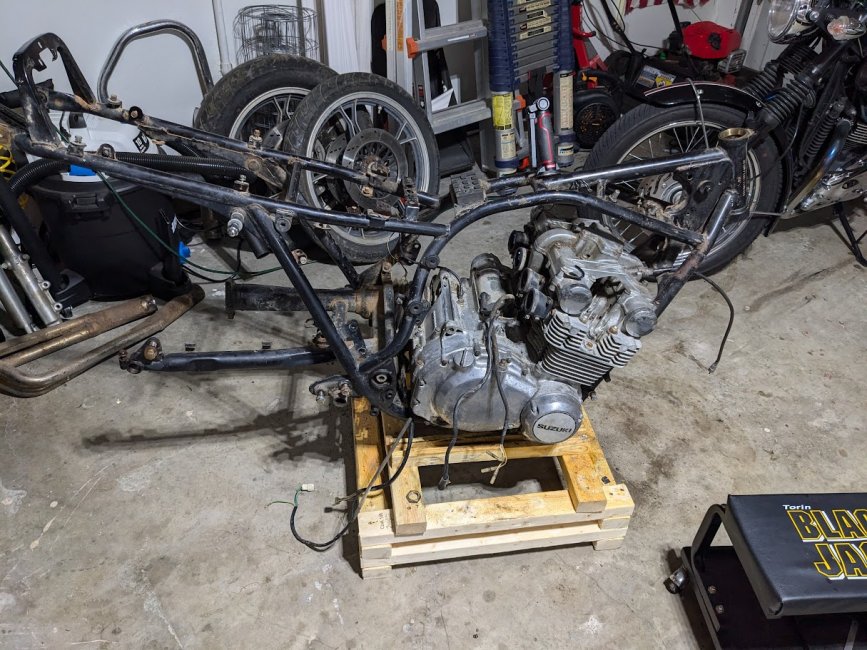
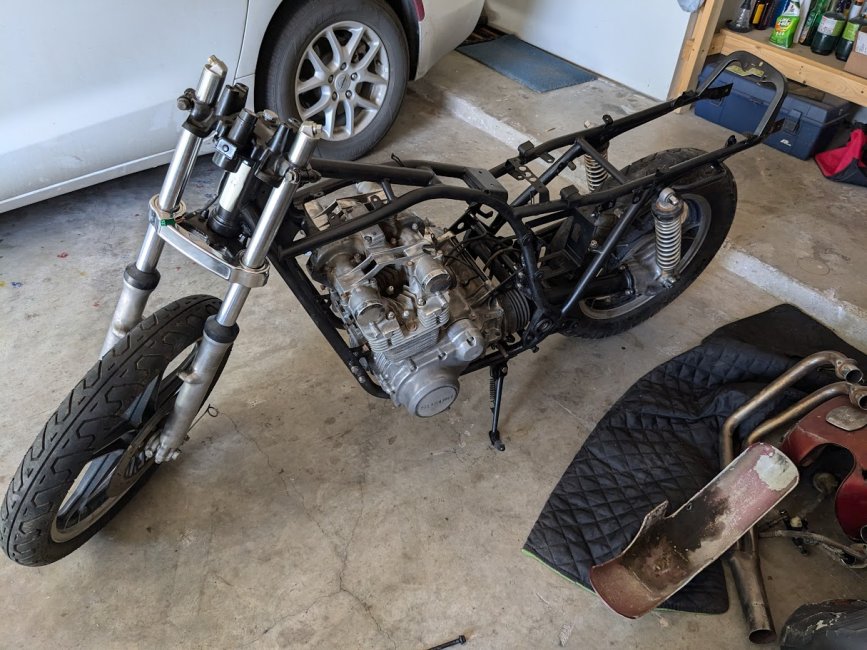
    Its a new to me 1982 Suzuki GS650 G.

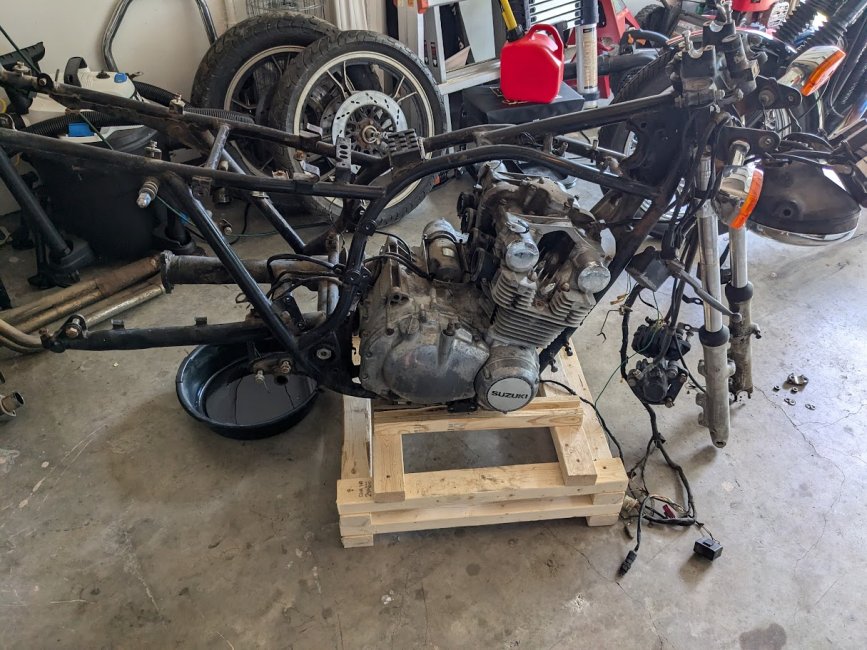
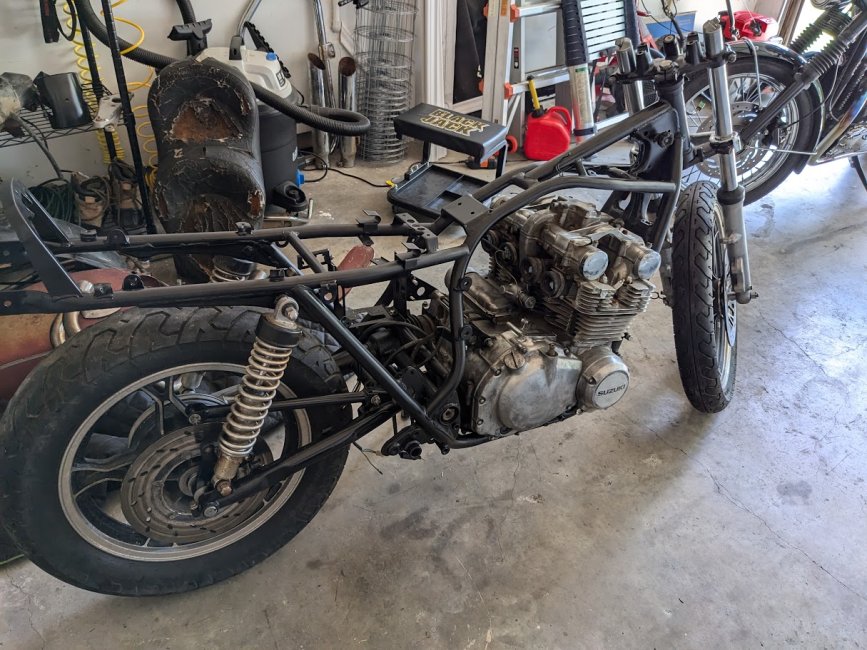
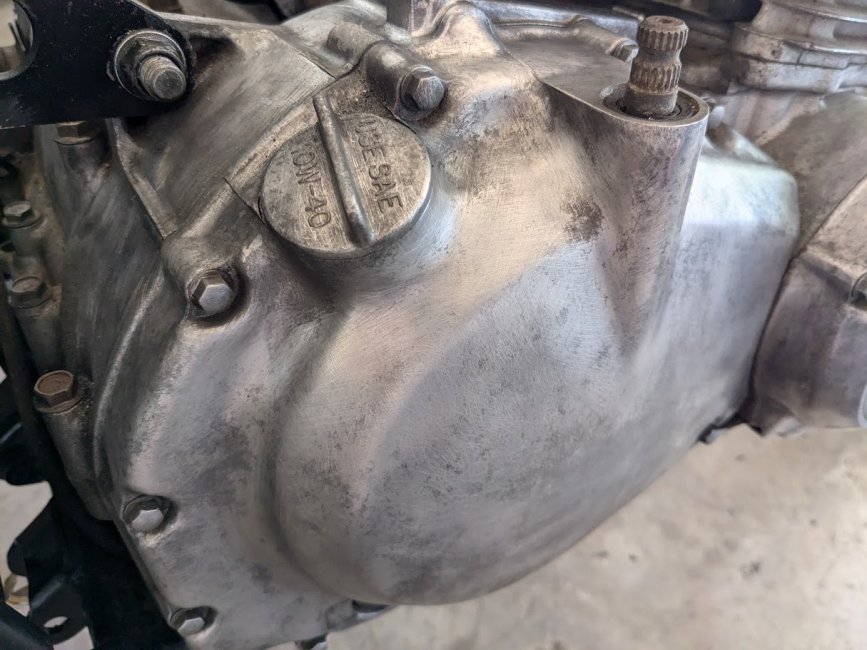
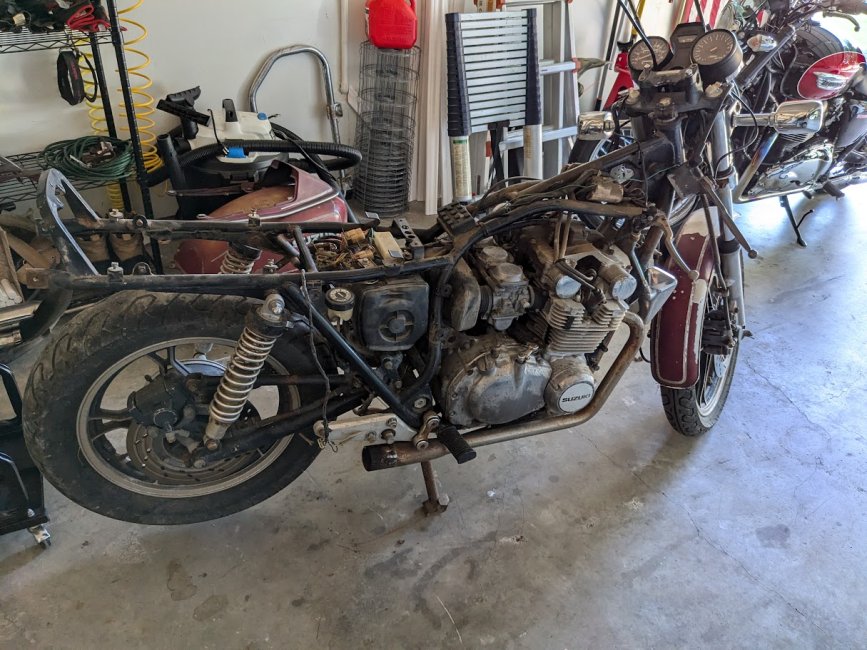
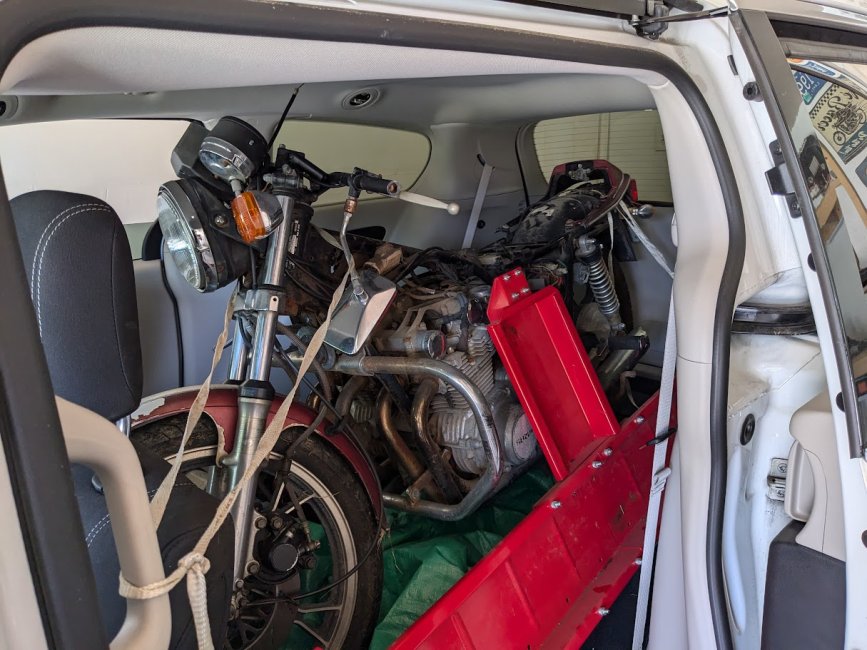
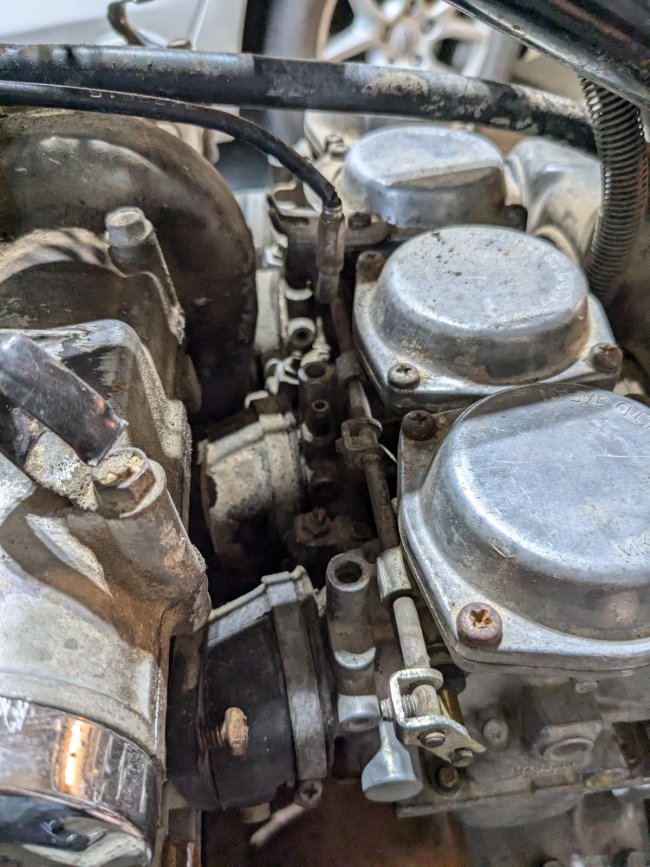
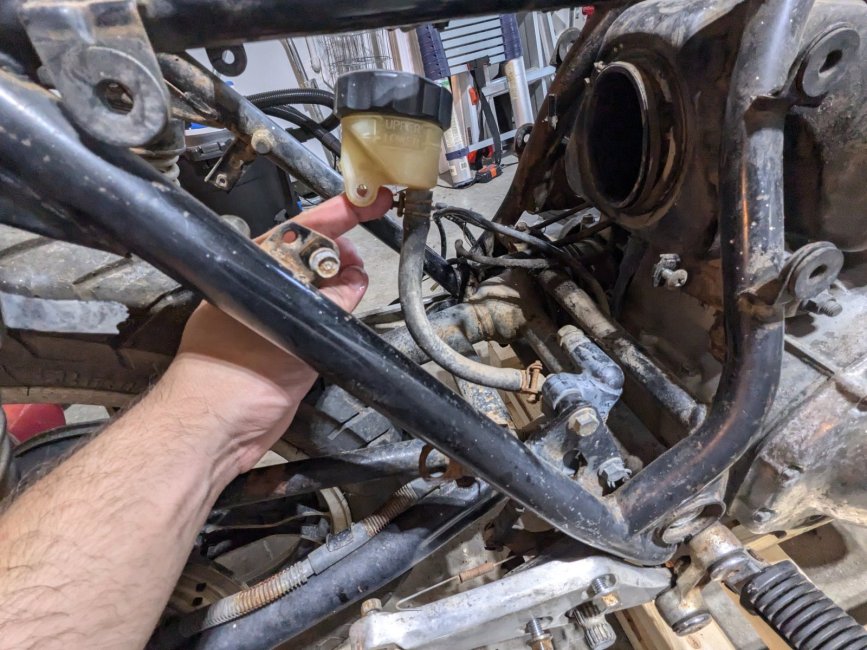
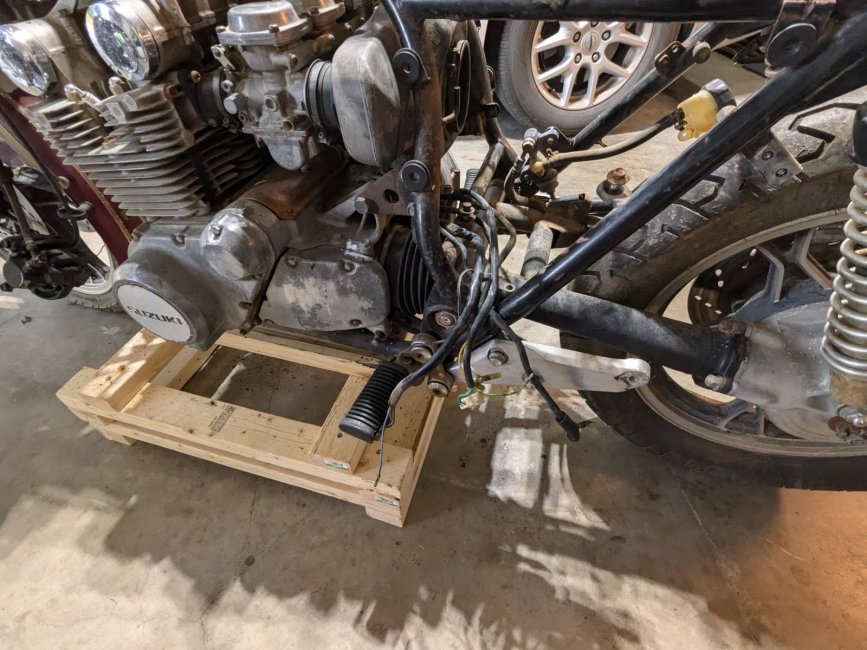
    Got it home in the minivan again and the seller was blown away I even got it inside. So far I've been limiting myself to what I do on the bike because the garage is 100+ and once I go through 64oz of water from my tumbler I'm done for the day (other than cleanup) so its been slow progress so far. Plus summertime work has picked up so sometimes I don't get done with work until about 7pm. Pretty straight forward like the last Japanese bike I worked on. Light rust but no stripped bolts (so far) or anything damaged for removal.

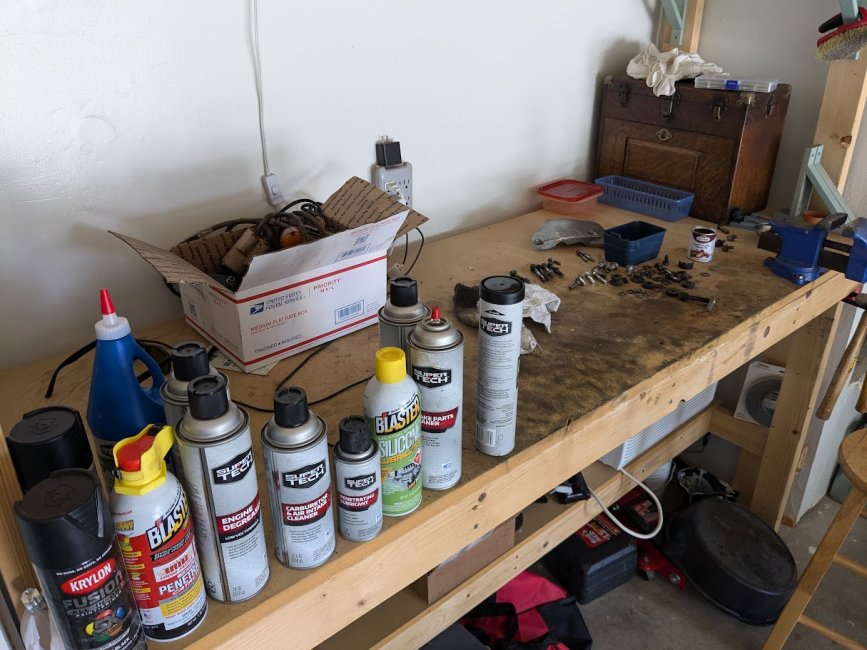
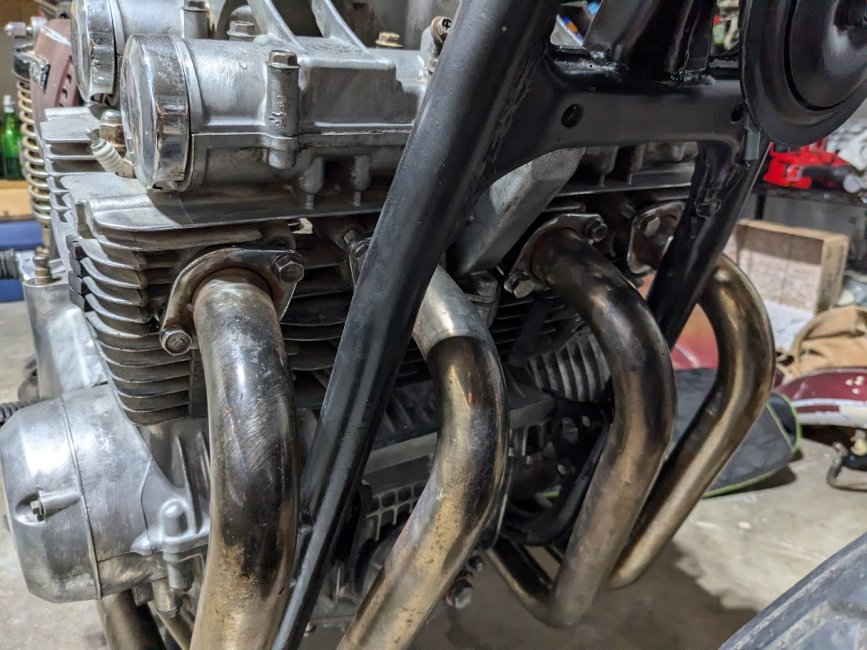
    Just like the last thread, I'll try to pop in with significant updates. Right now its just disassembly, assessment, and rattle canning of rusty stuff as I go. I plan on buying some aftermarket mufflers. I am not a "loud pipes save lives" person and enjoy hearing while I still can. The goal isn't to make it silent, but something tolerable if I decide to ride 2 miles to get a soda and fill up the gas can for the lawnmower.

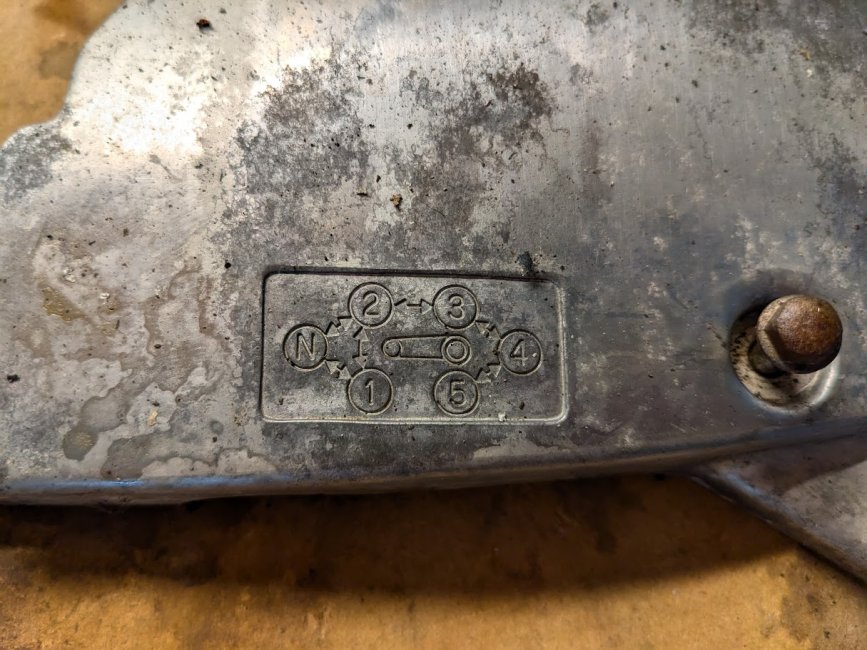
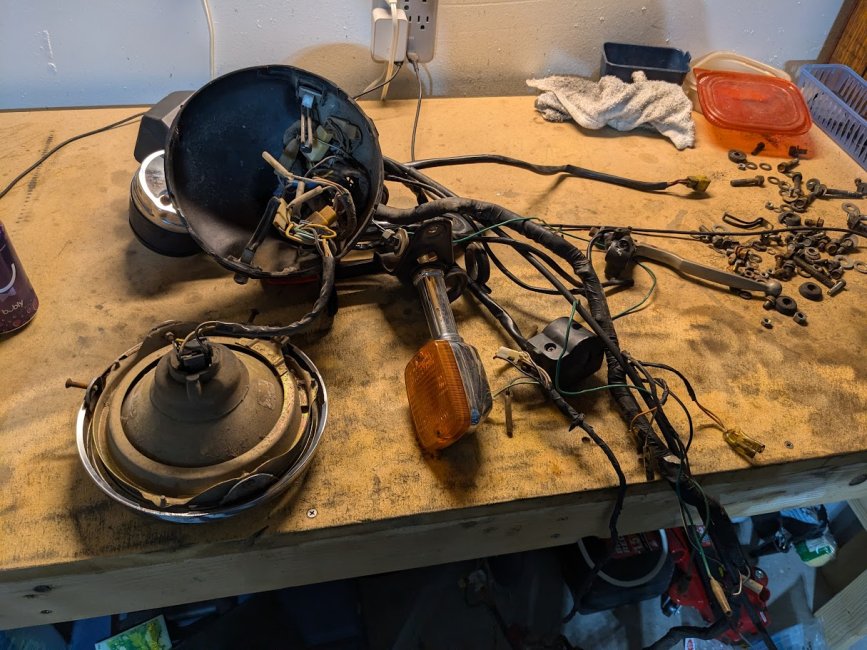
    I could use some help however, I'd really like to get keys for this, but all I have is a VIN. All the key sellers say the VIN tells them nothing and the 4 key tumblers have no real markings on them that I can tell. I have a digital copy of a service manual, and 2 vintage Suzuki forum links, but I'd rather not trawl through 10 year old posts trying to figure out problems and wiring if I don't have to, I may pick up another haynes manual if youtube and google can't help me.
    1. Ignition
    2. Helmet Lock
    3. Rear seat cowl
    4. Gas tank (to be replaced anyway)
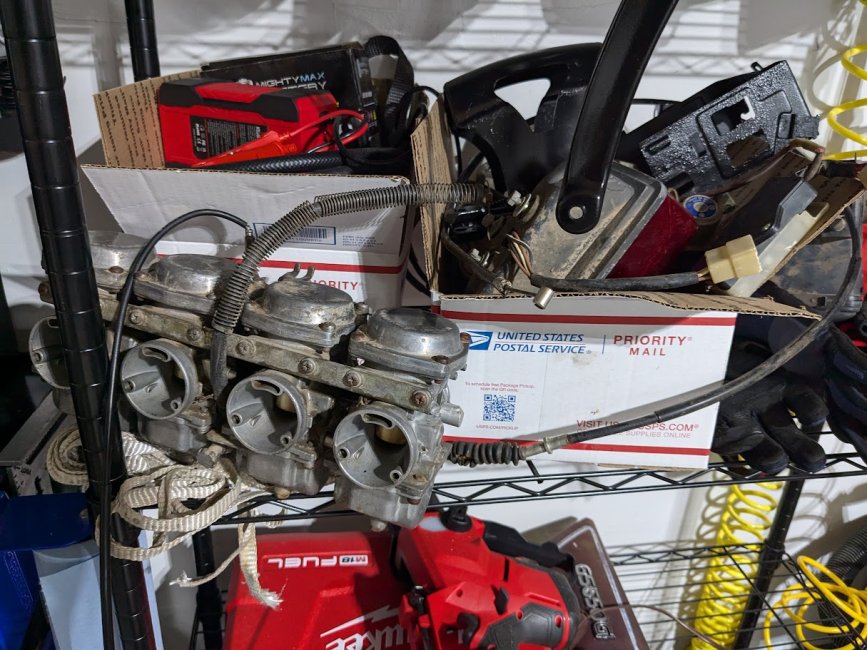
    I also need a lead on a gas tank (probably eBay), seat (either upholsterer locally or ebay again), left side body panel, and then painting of the painted parts once its all done.

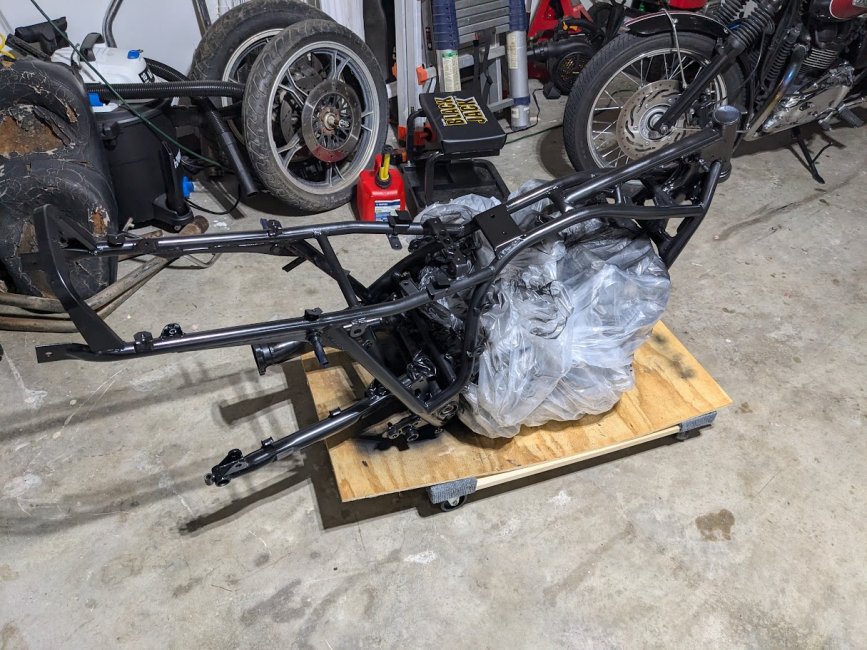
    I'm already having a ton of fun just getting my hands dirty and after rattle canning a few small parts (satin black of course) can already imagine what glory this bike can be restored to.
     

    Attachments

    • PXL_20240703_210652777.jpg
      PXL_20240703_210652777.jpg
      299.7 KB · Views: 49
    • PXL_20240703_210708484.jpg
      PXL_20240703_210708484.jpg
      304.4 KB · Views: 47
    • PXL_20240703_230614183.jpg
      PXL_20240703_230614183.jpg
      334.9 KB · Views: 45
    • PXL_20240701_174129170.jpg
      PXL_20240701_174129170.jpg
      280.2 KB · Views: 48

    OutlawStar

    Active Member
    Rating - 100%
    4   0   0
    Sep 14, 2017
    926
    76
    NorTex
    I'm not actually looking forward to rebuilding 4 carbs, the plan was to scrub the bare aluminum parts as best I could without complete polishing, just enough to knock the oxidation and aging off everything. I don't have a media blaster (anyone want to lend me theirs?) so brass and steel wire brushes is the life for me. I've got a power drill and dremel tool I'll be using to de-rust and de-oxidize. I may pick up a $140 bench grinder for some parts, a hand drill is unruly at best but is working at least for the first few parts. Going to paint another 4 small parts, and 1 big one before continuing with the strip down to get the rear arm and frame.

    Some signs that give me good hope this bike was cared for before parking is the brake fluid is mostly clear, amber oil, and only 1 residential wire nut used for what looks like a random splice or former repair.

    The Tach needle is broken off. I may live with that unless they're relatively cheap to replace on ebay.
     

    Attachments

    • PXL_20240703_210821896.jpg
      PXL_20240703_210821896.jpg
      202.9 KB · Views: 29
    • PXL_20240708_004753110.jpg
      PXL_20240708_004753110.jpg
      415.8 KB · Views: 30
    • PXL_20240708_005104206.jpg
      PXL_20240708_005104206.jpg
      369.2 KB · Views: 30
    • PXL_20240708_005246003.jpg
      PXL_20240708_005246003.jpg
      381.1 KB · Views: 34
    • PXL_20240710_005223980.jpg
      PXL_20240710_005223980.jpg
      239.1 KB · Views: 33

    brashears9567

    Active Member
    TGT Supporter
    Rating - 100%
    2   0   0
    Jun 12, 2016
    979
    76
    My first bike was an early 80's gs650. Had it in mid 90's.

    I remember it had CV carbs and they were not adjusted well. The revs would creep up at red lights. Couple of taps on the outside carb with a closed fist would lower the idle back down. Loved that bike though.


    Sent from my iPhone using Tapatalk
     

    OutlawStar

    Active Member
    Rating - 100%
    4   0   0
    Sep 14, 2017
    926
    76
    NorTex
    My first ride was a 78 GS550. I really liked the G models, too.
    What made them so special? What do I have to look forward to? I've heard shaft drives have a loss of like 20% power. I wonder if this thing is going to be a slow dog compared to my more modern bonneville with just 42 horsepower.
     

    kbaxter60

    Consider the Source
    TGT Supporter
    Rating - 100%
    1   0   0
    Jan 23, 2019
    11,304
    96
    Pipe Creek
    What made them so special? What do I have to look forward to? I've heard shaft drives have a loss of like 20% power. I wonder if this thing is going to be a slow dog compared to my more modern bonneville with just 42 horsepower.
    The shaft drive was so special. I got a bit tired of adjusting the chain, oiling the chain, and replacing chain and sprockets over time. Yes, shafts are not quite as efficient and there's a rise effect when you nail the throttle. My next road bike was a Yamaha 750 with shaft. I liked it. Then I realized that belt drive was where it's at.
     

    striker55

    TGT Addict
    Rating - 0%
    0   0   0
    Jan 6, 2021
    5,354
    96
    Katy
    You have quite a project, good luck. I had a Honda 750 SS in the mid 70's, I bought carb sticks, tubes with I think mercury that connected to the 4 carbs to adjust them.
     

    Shady

    The One And Only
    Rating - 0%
    0   0   0
    Aug 24, 2013
    4,869
    96
    if you have a decent air compressors you can usually find a used blast cabinet for 100 bucks on marketplace.
     

    OutlawStar

    Active Member
    Rating - 100%
    4   0   0
    Sep 14, 2017
    926
    76
    NorTex
    if you have a decent air compressors you can usually find a used blast cabinet for 100 bucks on marketplace.
    No decent air compressor. I got a cheap HF 2 gallon hot dog for airing up tires and blowing out computer cases a few years ago. Don't really have the garage space for a larger/better compressor to run a blasting cabinet.

    I'm currently struggling just to get the plastic airbox off the bike. It doesn't slide out left or right, nor can it move to the rear. I may have to buy a special tool (or maybe fish around for adapters) to get these philips head screws off the intake manifold. Has to be a low-clearance right-angle head. You can kinda see what I'm talking about in this pic. I'd like to get the engine out without developing a hernia in order to paint the frame regardless, was just hoping to give the carbs some good pre-soak on the healing bench.
     

    Attachments

    • PXL_20240708_004906492.jpg
      PXL_20240708_004906492.jpg
      370.5 KB · Views: 27

    Shady

    The One And Only
    Rating - 0%
    0   0   0
    Aug 24, 2013
    4,869
    96
    No decent air compressor. I got a cheap HF 2 gallon hot dog for airing up tires and blowing out computer cases a few years ago. Don't really have the garage space for a larger/better compressor to run a blasting cabinet.

    I'm currently struggling just to get the plastic airbox off the bike. It doesn't slide out left or right, nor can it move to the rear. I may have to buy a special tool (or maybe fish around for adapters) to get these philips head screws off the intake manifold. Has to be a low-clearance right-angle head. You can kinda see what I'm talking about in this pic. I'd like to get the engine out without developing a hernia in order to paint the frame regardless, was just hoping to give the carbs some good pre-soak on the healing bench.


    You can always cut the frame to get the air box out ya I am sure that is how it works :)

    good luck with the project
     

    OutlawStar

    Active Member
    Rating - 100%
    4   0   0
    Sep 14, 2017
    926
    76
    NorTex
    try one of these 3 bucks at harbor freight. Also search youtube you can make a mininblaster with a water bottle and spary nozzle

    The little 100psi hot dog compressor I have might do a few square inches at a time with that while the compressor is constantly on. Its really only good for powering a brad nailer, airing up tires, and blowing dust out of computers. I knew its limitations when getting it, but considering all that rigamarole I might as well continue by hand. I'm using a wire cup and a corded drill, I'm currently soaking a few intricate brackets in vinegar to de-rust them, and I have hand brushes and a dremel tool to complete the rust mitigation. The bench grinder might be purchased still for the aluminum engine parts and wheels.
    actually baking soda works well for blasting light rust without messing up to much stuff and its way better for cleaning the floors after.
    yeah mineral spirits seems to be doing a good job getting the rust off parts too. That baking soda acting as a light abbraisive would help, but I have other wire brushes and scrubby pads too.
     

    OutlawStar

    Active Member
    Rating - 100%
    4   0   0
    Sep 14, 2017
    926
    76
    NorTex
    Got just about everything other than the block out. I don't have an engine hoist and can't figure out how to remove the swing arm and drive shaft. I may just slum it and leave that stuff in place. Its not a show bike so if I leave a few parts not immaculately restored I think it'll justify saving a few hundred dollars in tools I may or may not use again. With a $200 bench grinder in the works, $20 for 1 socket, and possible specialized cleaners to get rid of the aluminum oxidation I'm not in a hurry to clean out the wallet.

    Probably weeks to months away, but I'm on the fence about 4 air-pod cleaners, or using the factory plastic air box. I'll probably make that decision if the side body panel is cheap enough to cover the air filter(s).
    I tilted the entire bike forward trying to clean the bottom of the engine and didn't notice all of the oil leaking out of the head somewhere, likely the vent. Probably fine since it'll sit upright for several more weeks before trying to start anyway, oil looked super clean and amber, either it was cared for before left in a field to rot, or the seller added a quart of oil to make it look like it had oil. Rookie mistake spilling oil like that, but whatever.
    Rear shocks I can compress by hand, but they're on the 'weakest' setting. Probably should simply replace them. The front fork shocks feel okay, and I can hear the ATF squishing around inside. I'll wait to see if those need replacement.

    I've been painting small parts with some Krylon satin black (rust removal, mineral spirits cleaned, painted) and its not the best sprayjob I've ever done, I'm mostly doing it for rust preservation and making it look good, not concours quality. I didn't really think about it, but I probably should have spent the 5x price on a spray enamel. Oh well.

    Next step is spraying the frame (see all the little rust spots), de-oxidizing the aluminum block, then beginning re-assembly. Brakes: no idea if the calipers are stuck because there was no reservoir or bar control. I assume swapping hydraulic lines is the smart choice considering the age of the bike and unknown history. I'd like to remove the brake discs too since those boltheads are rusted. After that will be carbs, electrics (wiring), and all the little things going back together, but thats a future-me problem.

    Internet says to avoid simple green, but I'm going to try WD40 and 000 steel wool to refresh everything aluminum. The aluminum wheels have painted inserts to complicate things. I'm hoping I don't have to spend 40 hours hand-rubbing aluminum when its 100 degrees in my garage, nor do I want to spend 20 hours with a dremel power-scrubbing everything, but this oxidized aluminum is just bothering me.
     

    Attachments

    • PXL_20240714_235835676.jpg
      PXL_20240714_235835676.jpg
      393 KB · Views: 26
    • PXL_20240713_191915918.jpg
      PXL_20240713_191915918.jpg
      333.9 KB · Views: 26
    • PXL_20240712_200946708.jpg
      PXL_20240712_200946708.jpg
      330.1 KB · Views: 22
    • PXL_20240712_125109210.jpg
      PXL_20240712_125109210.jpg
      250.8 KB · Views: 25
    Last edited:

    OutlawStar

    Active Member
    Rating - 100%
    4   0   0
    Sep 14, 2017
    926
    76
    NorTex
    TIL not all steel wire wheels are the same. I had an old harbor freight wire wheel to remove old paint and rust and I'd have to sit and let it zip on whatever I wanted for 10+ seconds to get it all off. It let loose all the little wires after several days of use. I got a wire wheel set from walmart and it was buzzing everything including metal off nearly instantly. I also learned you can dead stop a corded drill with painters plastic!

    I did a couple test spots with 0000 steel wool and WD-40 on the engine before giving up to wrap it and paint the frame. I think I just wanted to see a little more forward progress without this being a polish and spitshine job for the next few weeks. Waiting for the paint to dry before removing the plastic and painting the under-side of the frame and close to the engine before reinstalling the mounts and bolts. I don't really have the confidence in myself to remove the engine head to fully clean in those valleys, that may be a hose-jet situation once its running again. Not sure how else I'll get to some of those tight spots.

    Strange gear diagram on the side plate cover. (see attached pic) I know exactly what 1 down 4 up is, but this odd geometric shape wouldn't make sense to me 10 years ago.

    Next steps:
    1. Finish frame painting
    2. Bolt the engine back
    3. Begin assembly, replacing parts as necessary
    4. De-oxidizing the aluminum on the engine, final cleaning of engine while waiting for replacement parts online
    5a. More replacement parts like keys, this bike is older than I am and I've broken a few rubber grommets, some bolts aren't in great shape. Only 1 stripped by me due to user error with a tool.
    5b. Painting of body panels and gas tank. I'll probably go with a factory-close color. The maroon or dark blue looks nice online. Still undecided if I should rattle can and vinyl pinstripe tape, or pay a paint shop to do it right.
    6. Wiring. All parts are there, but corrosion is visible on some connectors, and a few ancient plastic parts have already chipped and cracked during disassembly
    7. Seat; either full replacement or paying a guy to do it. Not sure if there are bolt-on foam kits.
    8. Carbs. I'm dreading that week. Its either rebuilding 4 carbs and re-tuning them, or just hoping they're good as is.
    9. Final assembly, startup, and first ride.
    10. Getting a new title, registration, plating, and insurance.
     

    Attachments

    • PXL_20240720_214056058.jpg
      PXL_20240720_214056058.jpg
      389.3 KB · Views: 24
    • PXL_20240720_214157664.MP.jpg
      PXL_20240720_214157664.MP.jpg
      284.9 KB · Views: 25
    Last edited:

    OutlawStar

    Active Member
    Rating - 100%
    4   0   0
    Sep 14, 2017
    926
    76
    NorTex
    Frame is painted, engine mount missing 1 bolt but the bike back on its own 2 wheels. Front shocks feel good, I don't even want to disassemble them to inspect. I'm putting off buying rear shocks despite their rusted chrome appearance, I can't tell if they're good or bad. Wire wheeling of old corrosion, rust, and dirty parts continues. I'm getting away from the aluminum restoration on the engine for now; it feels like I get it to an okay appearance then any drips or junk on it and it looks worse. I'm half tempted to take an artists approach to things and leave the formerly chrome pieces kinda corroded and rusty, I've never liked "patina" (its rust and its cancer), corrosion, or ratrod look. But I think without a media blaster they're just never going to look how I want them to.

    Anyone have any idea what these rubber things are in the engine fins in the 5th pic? Coincidentally, 2 fell off in that pic on the side where your legs might touch, but there are some on the front and rear of the cooling fins as well. I don't see an obvious reason why they exist.

    Hot tip: blue painters tape on a 40 year old foil label pulls everything right off. I did not learn this in my 8th grade chemistry class. Bonus pic of my workbench since someone asked. I really do enjoy this stuff as a hobby and would really hate it as a job. Truth be told I'm looking forward to getting the bike running and roadworthy again. I'm also looking forward to cleaning all of my tools, refreshing the workbench surface and putting another coat of paint on my lil blue vise.

    I started looking up parts last night: rear shocks are $100, front brake cylinder is $200, rear is about $150, Brake lines are about $300, gas tank will be $300, handlebar and controls will probably be another $200, then little bits and bobs like cables, pads, grommets, will be another $150. I think I'm going to hold off on that stuff until its closer to engine start time. I'll need controls, just to start everything plus the gas tank, but the seat will likely be the last thing I do.
     

    Attachments

    • PXL_20240721_153452745.jpg
      PXL_20240721_153452745.jpg
      192.8 KB · Views: 19
    • PXL_20240728_184727975.jpg
      PXL_20240728_184727975.jpg
      312.9 KB · Views: 20
    • PXL_20240728_184734957.jpg
      PXL_20240728_184734957.jpg
      347.1 KB · Views: 19
    • PXL_20240728_184813083.jpg
      PXL_20240728_184813083.jpg
      239.1 KB · Views: 22
    • PXL_20240728_184817690.jpg
      PXL_20240728_184817690.jpg
      253.3 KB · Views: 21
    • PXL_20240728_184913329.jpg
      PXL_20240728_184913329.jpg
      261.4 KB · Views: 20

    OutlawStar

    Active Member
    Rating - 100%
    4   0   0
    Sep 14, 2017
    926
    76
    NorTex
    Still working on stuff, but with 100+ temps its a good 95+ in the garage so I get a solid 20 minutes before having to go inside to avoid sweating on everything.
    I'm currently loading up the parts cannon to buy handle bars, gas tank, left and right controls, fuel tank, petcock, front master cylinder, and a few other "cosmetic" items that aren't completely necessary but will be leagues better than universal parts.

    Used a helicoil for 2 of the exhaust manifold bolts, they seem to be holding torque, making my donations to the engine gods so they'll hold.

    Working on 42+ year old electrics makes me want to toss the entire thing into a dumpster for some reason, but I'm repairing wiring as I go. I have the wrong size battery but I also haven't even connected anything to test anything. Still working out all the connections and prior bubba repairs. Nothing like finding a residential wiring nut used as a wire connector and all of the wires on that leg of the harness were simply cut off.

    Maybe you guys will know; there are 3 nipples in the carb photo. 2 are plastic between 1&2, and 3&4, and a third in the middle of all of them with a rubber hose. Anyone know which might be the fuel inlet and which may be an overflow tube? Initial plan (to save a few bucks) was to simply install it all, connect it to a fuel tank (another nightmare) and see if the carbs are good without $140 of rebuild kits.

    Pending a couple offers on ebay for stuff leek handle bars, fuel tank (theres 3 different ones for this model) and then it might make its first start in however many years.
     

    Attachments

    • PXL_20240813_014253465.jpg
      PXL_20240813_014253465.jpg
      255.6 KB · Views: 12
    • PXL_20240818_204401677.jpg
      PXL_20240818_204401677.jpg
      349.7 KB · Views: 9
    • PXL_20240825_172254335.jpg
      PXL_20240825_172254335.jpg
      313.8 KB · Views: 10
    • PXL_20240825_172627967.jpg
      PXL_20240825_172627967.jpg
      311.4 KB · Views: 10
    Top Bottom