Good afternoon Gents.
Let's start this off with a quick quote:
Proverbs 16:27-29 "Idle hands are the devil’s workshop"
Over the past few years I have been pondering over which is better for shotgun home defense: Slugs vs. Buck Shot vs. Bird Shot
For any of us that have a shotgun next to our bed I am pretty sure you have wondered about this also and may have already chosen a side as to which IS better. There are those that swear that Bird Shot is the way to go, and others that say Buck or Slugs should be the minimum. Whatever you choose, well hey I bet ALL will work since I have yet to meet a person that is willing to get shot with anything.
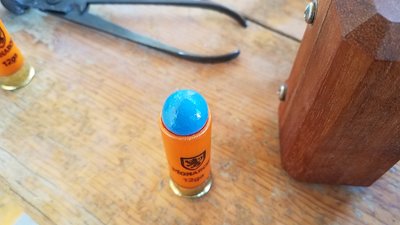
Well I got to thinking if there already is a load called Buck and Ball, who is making Shot and Ball? I figure that you get the slug aspect that provides the wanted punch followed by the wonderful light/painful spread of 8 shot not too far behind it. Needless to say, I have been unable to find company that manufacturers this pair... So on an idle Saturday last year, I started to develop my own improvised loads with Shot & Ball in mind. I believe I have discovered the right combination. Caveat though - if you do this,use at your own risk. If you mess this up it is on you. I know what my shot guns can handle.
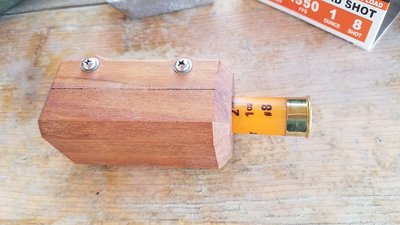
As we all know 12 ga Buck Shot and even Slugs run a little over $1 per shell. I tend to shoot a lot thus I am always looking for ways to save some coin. Over the past few years I have been doing ok with making wax slugs and even 1 oz soft cast slugs using the standard bird 2 3/4 target shells using the cutting tool made by Mountain Storm:
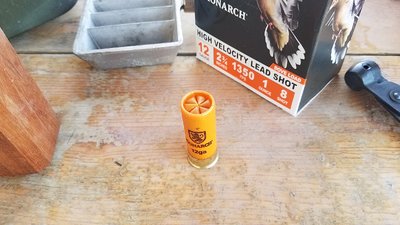
Obviously this is not my first round of making these, but for this post I went to Academy and bought a few boxes of cheapo Monarch bird shot to get this project off the ground as these should work fine. A box of 25 of 1 oz, 8 shot, 1300 fps+ for $4.49 was as low as I could go. In fact, any shells will work:

These shells are standard (soft) lead shot and should melt easily in the pot. Here is a link for the .69 caliber roundball I used:
https://www.trackofthewolf.com/Categories/PartDetail.aspx/1195/1/MOLD-BAG-680
Lee also makes one:
https://www.midwayusa.com/product/1010214924/lee-1-cavity-bullet-mold-690-diameter-round-ball
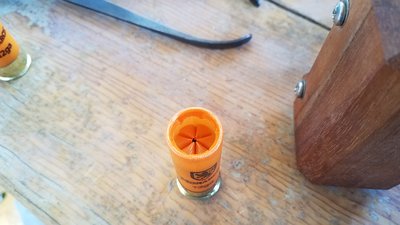
Here is a before and after of the cut shells:

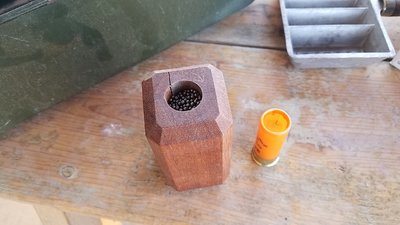
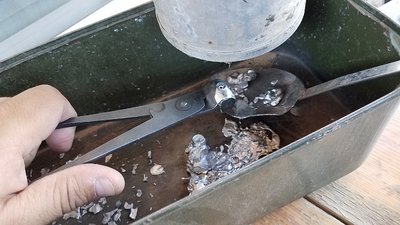
Using the shell cutter I picked up from Mountain Storm, I cut about 50 of them and poured the lead shot into the melting pot:


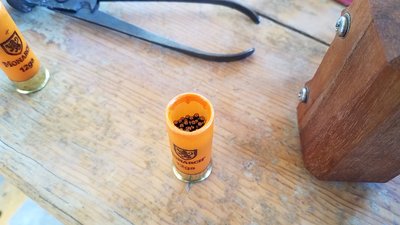
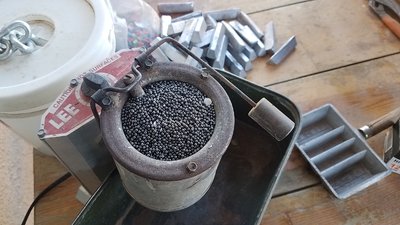
Make sure to keep the crimps you cut off as these will be used later. Once all of the shells are cut and emptied, get the pot up to temperature and start casting. You may have extra shot from these and that is ok. FYI, you will need this extra shot with a about a scoop full more of your own to finish the shells.


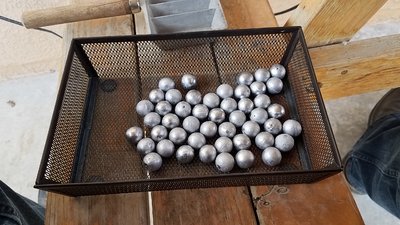
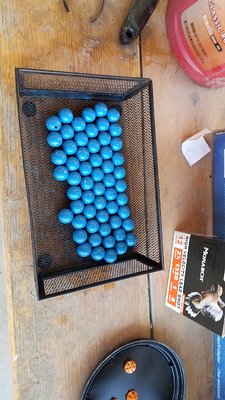
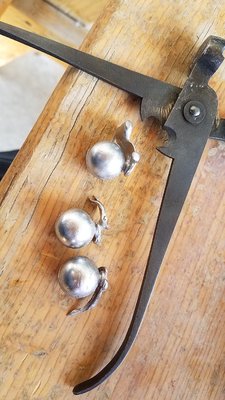
After a hour or so you end up with enough to move on to the next step.

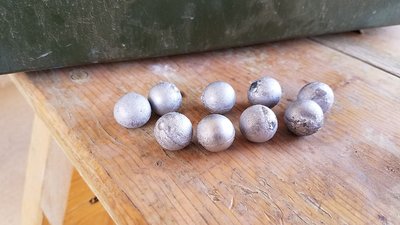
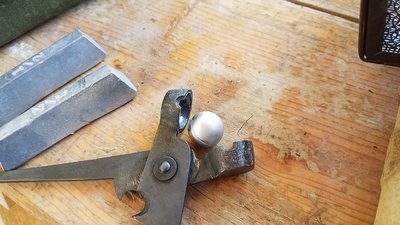
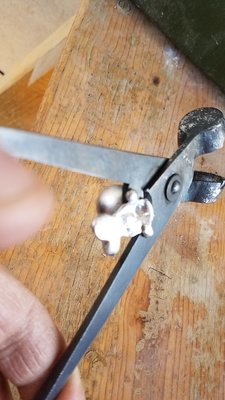
Cut the Sprue:


They don't have to be pretty, just round. The lead is soft enough to knock down a few of the high spots. If the ball looks way out of proportion, toss it back in the pot.
Let's start this off with a quick quote:
Proverbs 16:27-29 "Idle hands are the devil’s workshop"
Over the past few years I have been pondering over which is better for shotgun home defense: Slugs vs. Buck Shot vs. Bird Shot
For any of us that have a shotgun next to our bed I am pretty sure you have wondered about this also and may have already chosen a side as to which IS better. There are those that swear that Bird Shot is the way to go, and others that say Buck or Slugs should be the minimum. Whatever you choose, well hey I bet ALL will work since I have yet to meet a person that is willing to get shot with anything.
Well I got to thinking if there already is a load called Buck and Ball, who is making Shot and Ball? I figure that you get the slug aspect that provides the wanted punch followed by the wonderful light/painful spread of 8 shot not too far behind it. Needless to say, I have been unable to find company that manufacturers this pair... So on an idle Saturday last year, I started to develop my own improvised loads with Shot & Ball in mind. I believe I have discovered the right combination. Caveat though - if you do this,use at your own risk. If you mess this up it is on you. I know what my shot guns can handle.
As we all know 12 ga Buck Shot and even Slugs run a little over $1 per shell. I tend to shoot a lot thus I am always looking for ways to save some coin. Over the past few years I have been doing ok with making wax slugs and even 1 oz soft cast slugs using the standard bird 2 3/4 target shells using the cutting tool made by Mountain Storm:
Obviously this is not my first round of making these, but for this post I went to Academy and bought a few boxes of cheapo Monarch bird shot to get this project off the ground as these should work fine. A box of 25 of 1 oz, 8 shot, 1300 fps+ for $4.49 was as low as I could go. In fact, any shells will work:
These shells are standard (soft) lead shot and should melt easily in the pot. Here is a link for the .69 caliber roundball I used:
https://www.trackofthewolf.com/Categories/PartDetail.aspx/1195/1/MOLD-BAG-680
Lee also makes one:
https://www.midwayusa.com/product/1010214924/lee-1-cavity-bullet-mold-690-diameter-round-ball
Here is a before and after of the cut shells:
Using the shell cutter I picked up from Mountain Storm, I cut about 50 of them and poured the lead shot into the melting pot:
Make sure to keep the crimps you cut off as these will be used later. Once all of the shells are cut and emptied, get the pot up to temperature and start casting. You may have extra shot from these and that is ok. FYI, you will need this extra shot with a about a scoop full more of your own to finish the shells.
After a hour or so you end up with enough to move on to the next step.
Cut the Sprue:
They don't have to be pretty, just round. The lead is soft enough to knock down a few of the high spots. If the ball looks way out of proportion, toss it back in the pot.
Attachments
-
 1.jpg558.7 KB · Views: 679
 -
 2.jpg462.6 KB · Views: 621
 -
 3.jpg456.3 KB · Views: 692
 -
 4.jpg398.7 KB · Views: 695
 -
 5.jpg532.6 KB · Views: 640
 -
 6.jpg475.7 KB · Views: 628
 -
 7.jpg489.4 KB · Views: 620
 -
 20190224_102902.jpg648.2 KB · Views: 592
 -
 20190224_102941.jpg561.8 KB · Views: 575
 -
 20190224_103021.jpg454.4 KB · Views: 592
Last edited: