Gun Zone Deals

RC Build: Clipped Wing Cub

The #1 community for Gun Owners in Texas

Member Benefits:

  • Fewer Ads!
  • Discuss all aspects of firearm ownership
  • Discuss anti-gun legislation
  • Buy, sell, and trade in the classified section
  • Chat with Local gun shops, ranges, trainers & other businesses
  • Discover free outdoor shooting areas
  • View up to date on firearm-related events
  • Share photos & video with other members
  • ...and so much more!
  • Younggun

    Certified Jackass
    TGT Supporter
    Local Business Supporter
    Rating - 100%
    6   0   0
    Jul 31, 2011
    53,727
    96
    hill co.
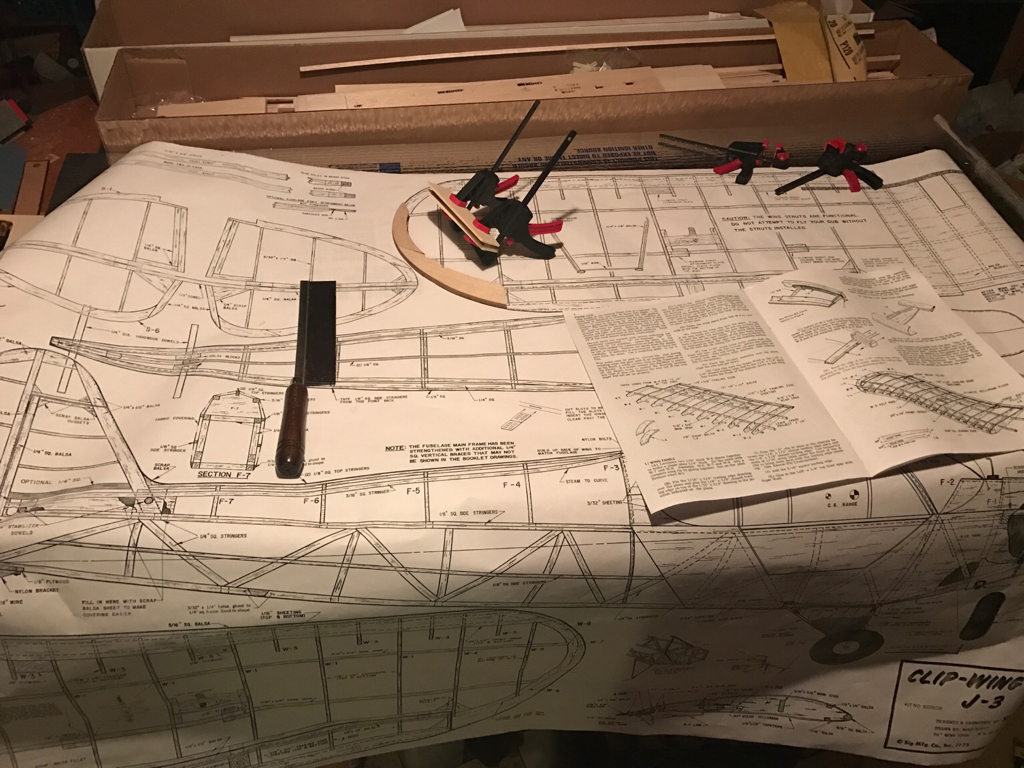
    Got another RC project for Christmas. A 56" wingspan clipped wing J3 Cub.

    f1c8eedbfef462dc5111a7224bcff940.jpg


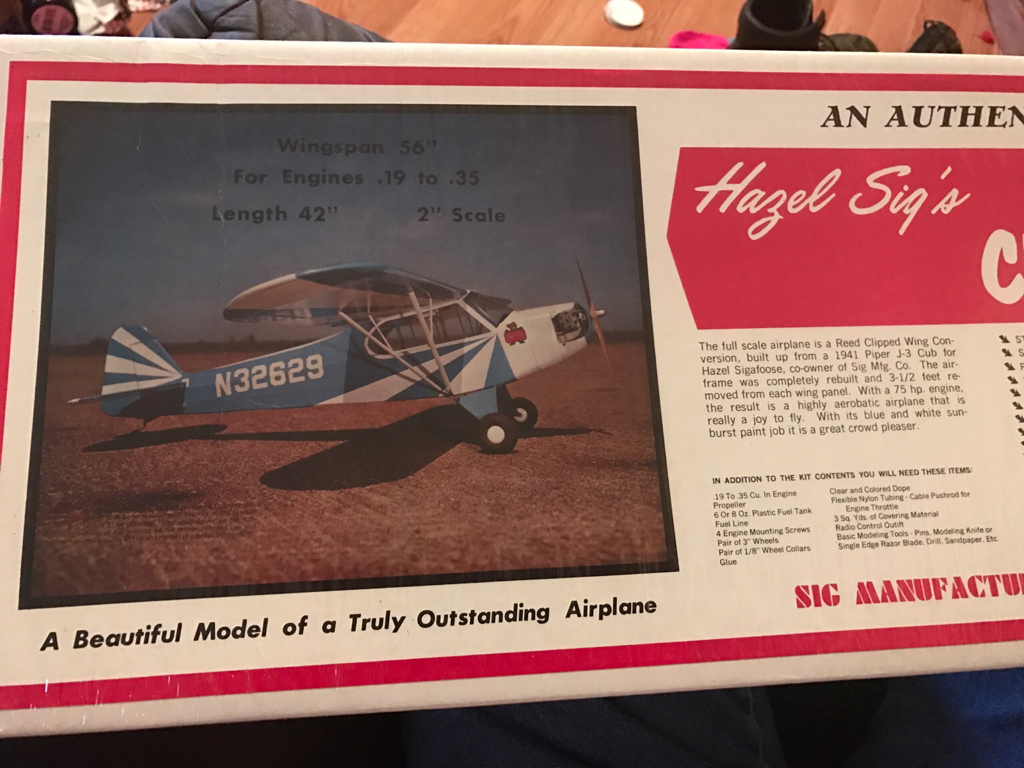
    Gonna be a fun project. The kit is much older than the others I've built and the instructions, plans, and build method show it.

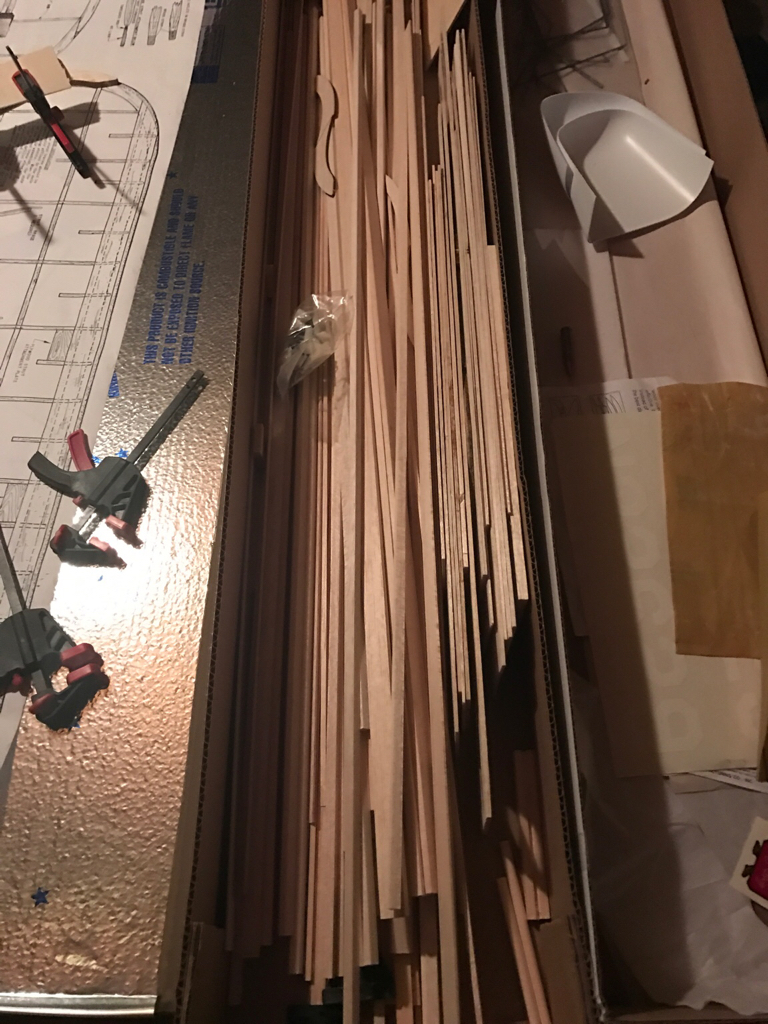
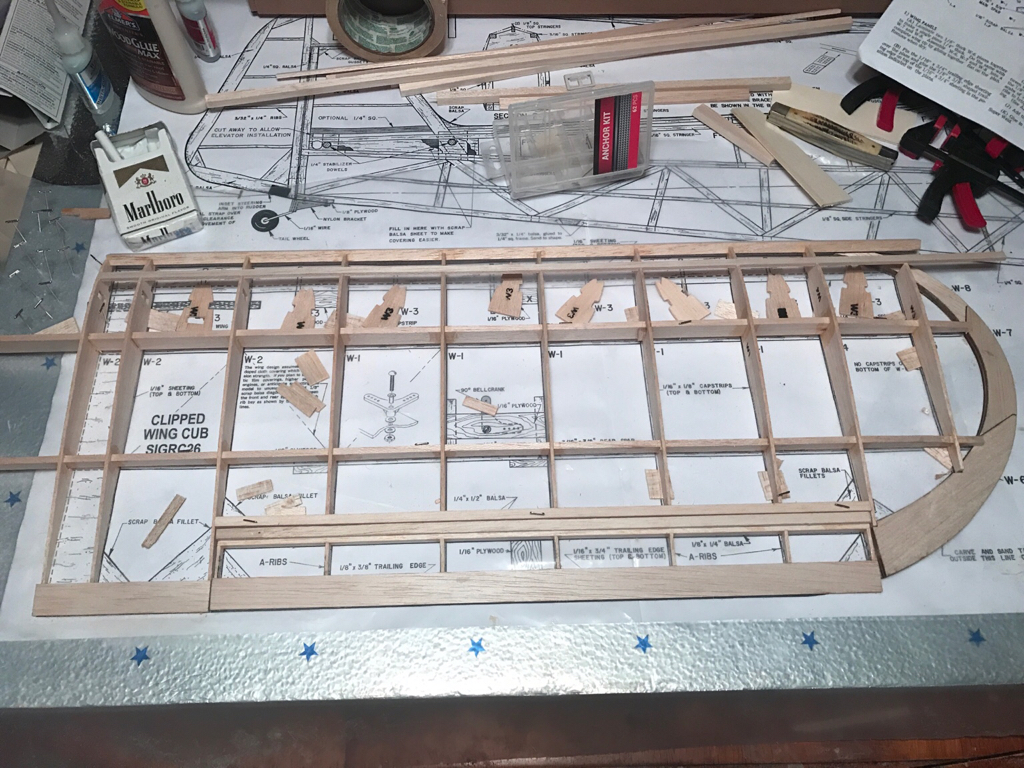
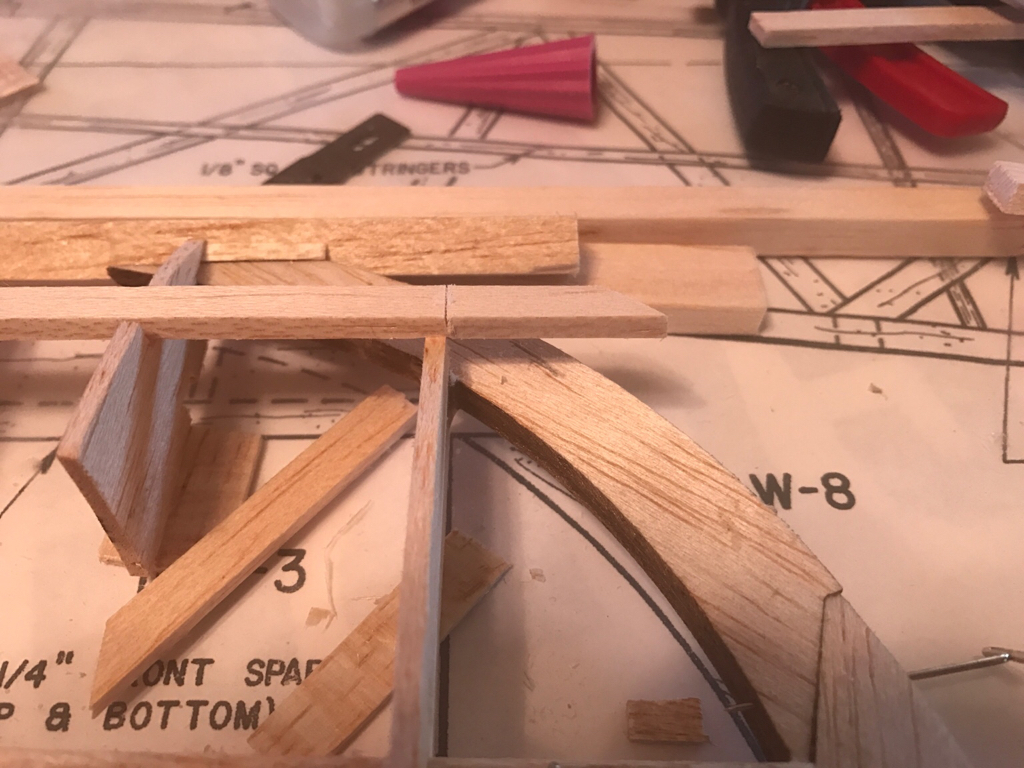
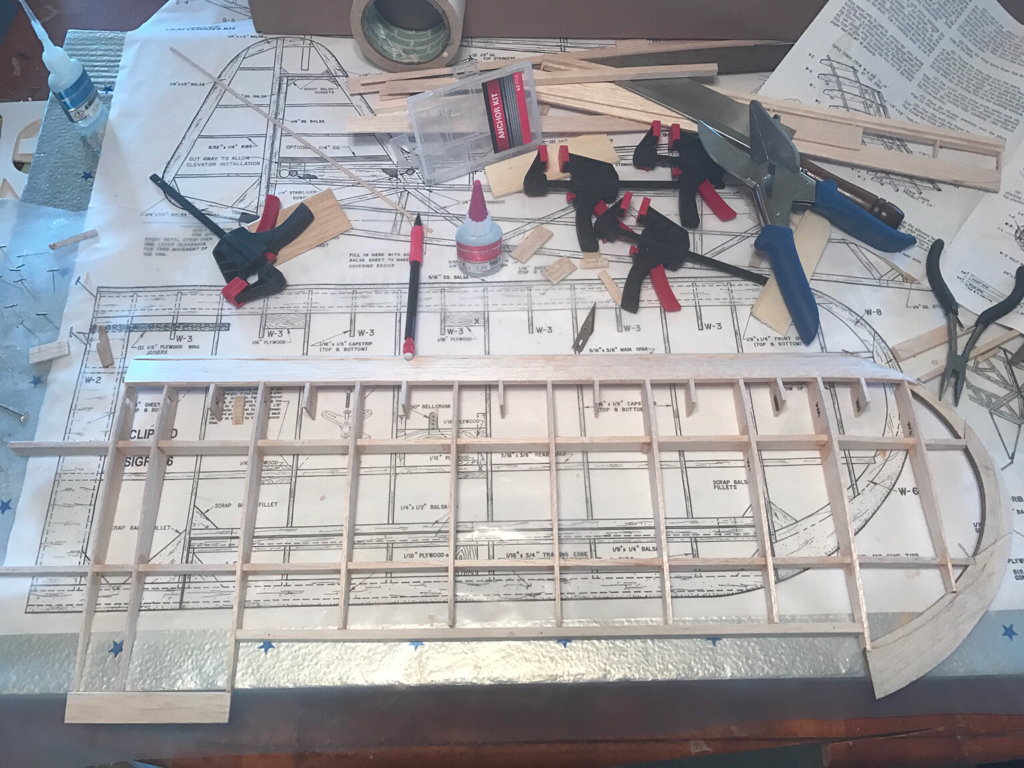
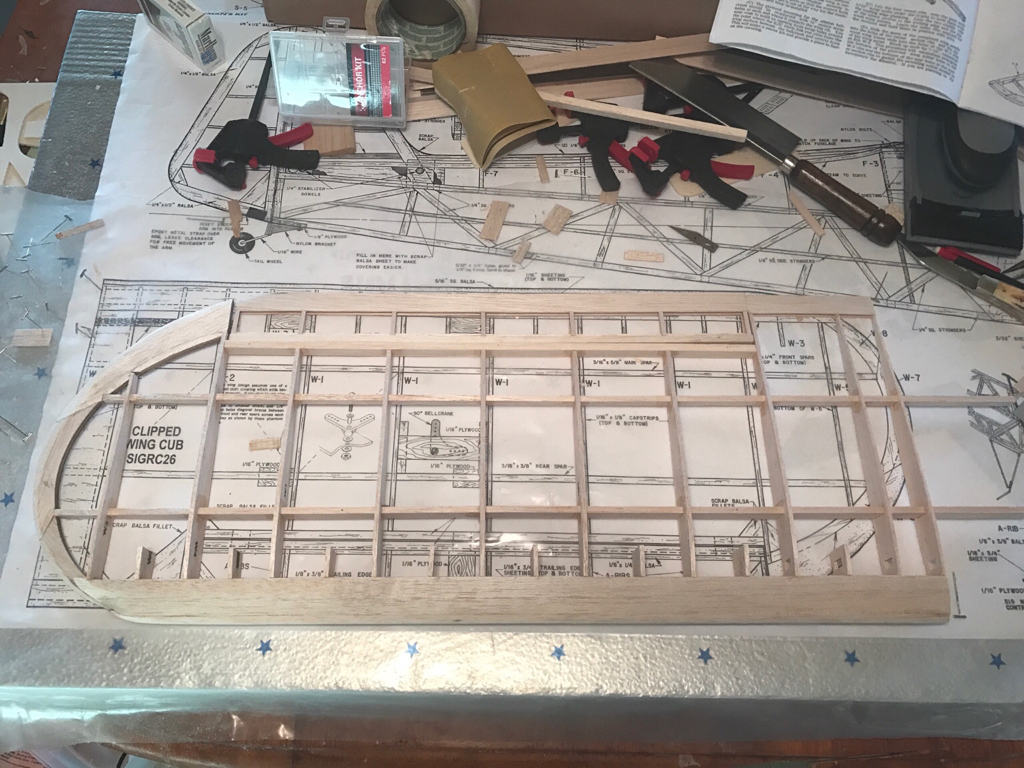
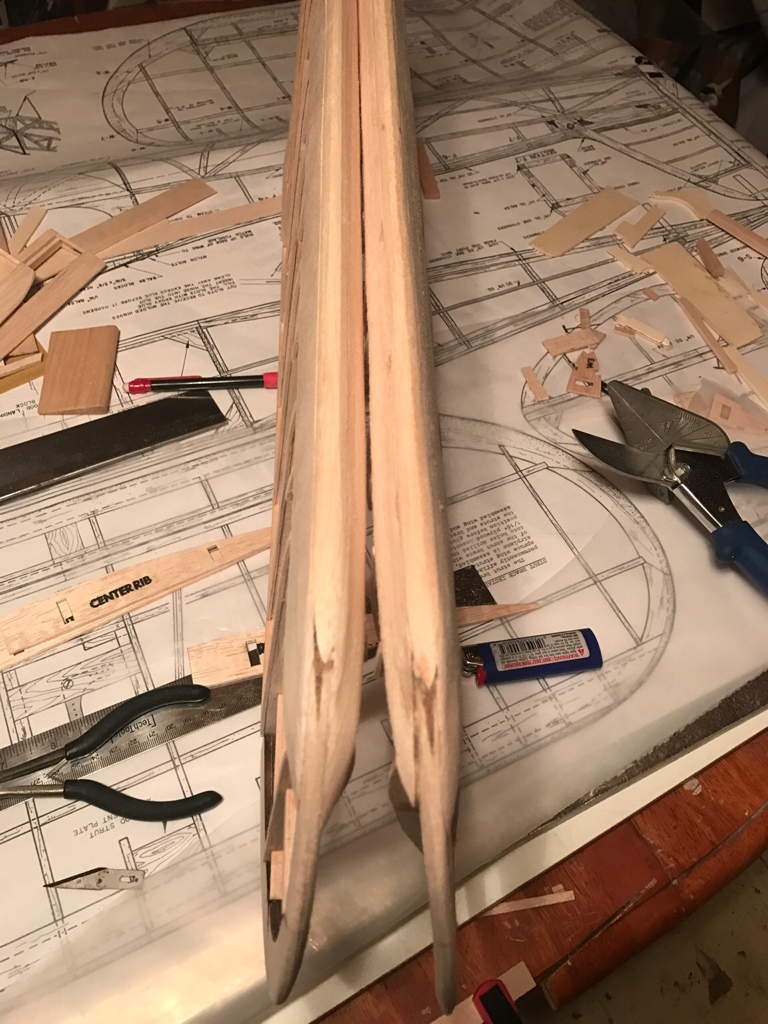
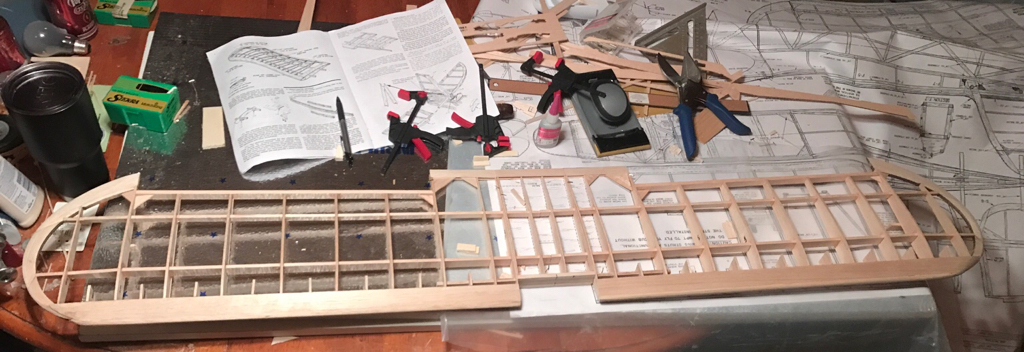
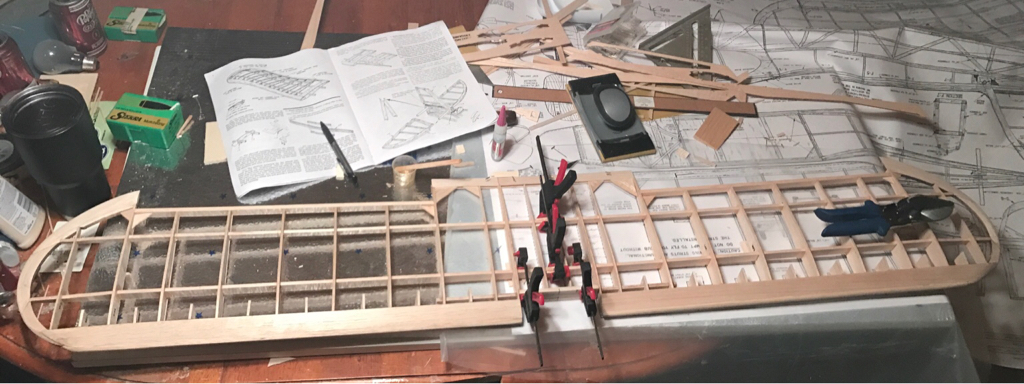
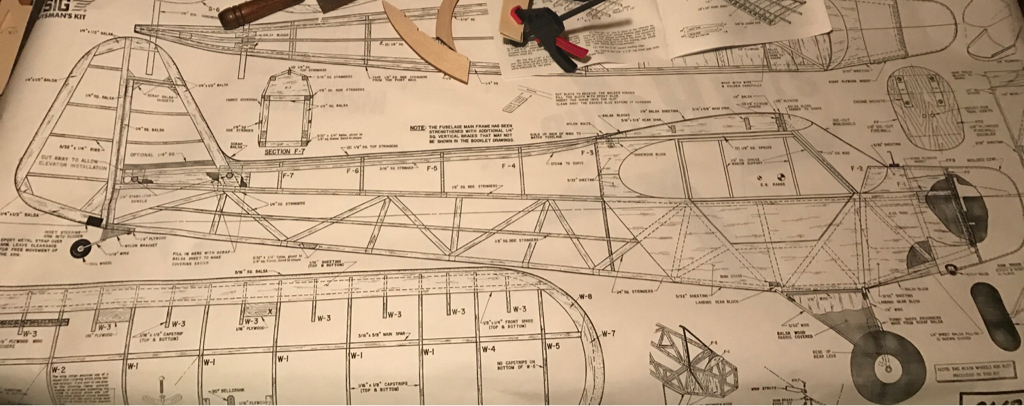
    This one has very few precut pieces. Where the fuse was constructed mostly of precut ply sheets on previous models I've done, this one is built up from sticks that are all cut and fitted by the builder. For the extra work that is to be done, the plans and instructions only give about 20% of the information compared to the newer kits. The plans comprise 1 sheet whereas the other models had 2 or 3 showing individual assemblies at different angles. Th book is about 8 pages vs 45 or so for the others with pictures to accompany every step. This one also requires any curved surfaces to be sanded and shaped, not even a piece of quarter round in the kit for a leading edge.

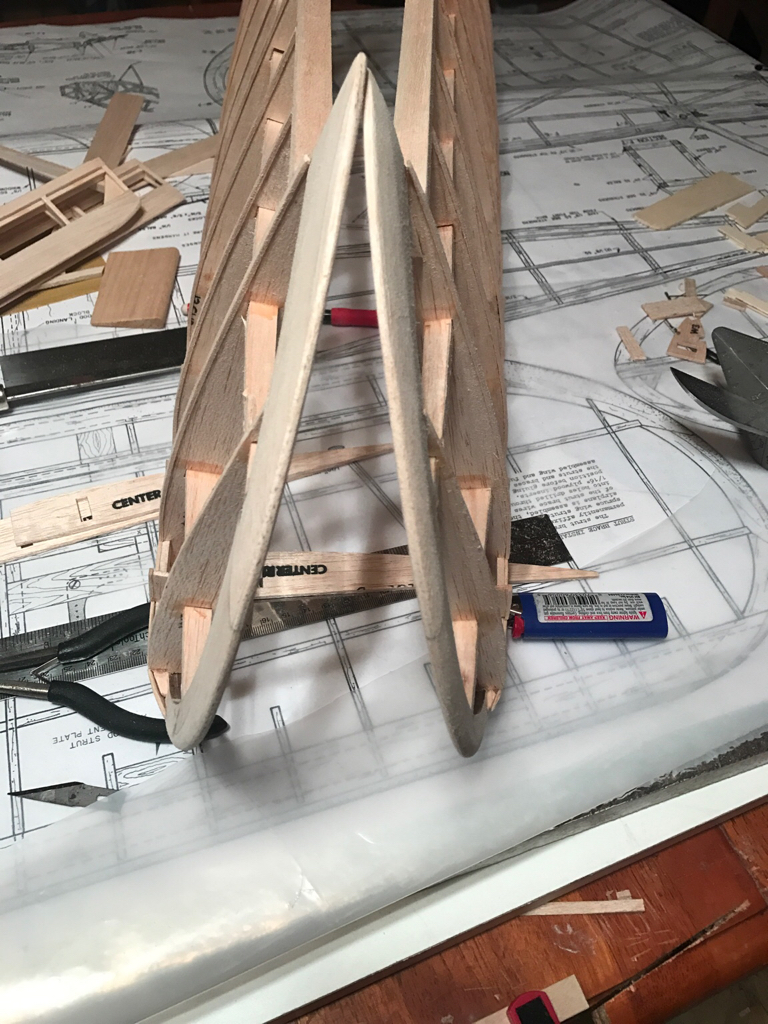
    It's going to be a challenge and one I look forward to. No rushing, and I will probably use very little CA glue on this one, instead mostly going with slow drying wood glue. Makes for easier sanding and a joint that retains the flexibility of balsa instead of a very hard and somewhat brittle joint.


    Fuselage construction plan
    c6488d71365e6f327ac0881277df6555.jpg


    Sent from my iPhone using Tapatalk
    ARJ Defense ad
     

    Younggun

    Certified Jackass
    TGT Supporter
    Local Business Supporter
    Rating - 100%
    6   0   0
    Jul 31, 2011
    53,727
    96
    hill co.
    First step is giving together some of the few precut pieces to make the wing tips which will have to be sanded in to shape later. Probably the only easy step in the build.

    58a1f569967ce20766f698655d2bb51e.jpg


    The rest of the kit
    9957cd3e6575ef9ab00724db86a895ec.jpg


    Sent from my iPhone using Tapatalk
     

    Younggun

    Certified Jackass
    TGT Supporter
    Local Business Supporter
    Rating - 100%
    6   0   0
    Jul 31, 2011
    53,727
    96
    hill co.
    Very unlikely. I like my foam electrics for something to grab and go, but I enjoy the old school ways in the wood planes.

    I'm debating between an OS .35 2 stroke and a Saito FA-40A 4 stroke. The .35 has more power and is lighter, but the Saito would have a much nicer sound I think. I have a short runway so having the extra power may be the deciding factor, even though I plan to fly it pretty lazily.


    Sent from my iPhone using Tapatalk
     

    Younggun

    Certified Jackass
    TGT Supporter
    Local Business Supporter
    Rating - 100%
    6   0   0
    Jul 31, 2011
    53,727
    96
    hill co.
    Started on the right wing and aileron. Got it framed up with the ribs and front and rear spars. Trying to avoid CA and use wood glue but on the ribs I think I'll have to use thick CA. Just not any pressure to push wood glue in to the pores for a strong bond.

    4f59062f470ac4e83da4745222ce4359.jpg


    Sent from my iPhone using Tapatalk
     

    Younggun

    Certified Jackass
    TGT Supporter
    Local Business Supporter
    Rating - 100%
    6   0   0
    Jul 31, 2011
    53,727
    96
    hill co.
    Wing is mostly built along with aileron. I swear the instructions just leave out about half the steps. Even looking on line for tips there's a lot of people just finding ways that work and no one knowing what how it was actually intended to be done.

    Only a slight hiccup on some sanding on the aileron, but I figured it out before I did enough to cause any problems. Gotta let glue dry on the front most spar now before I put in the half ribs and wing tip. Wing tip will be a major adventure in lack of informative instructions. Seems like the cabin is a little more straight forward though so hopefully I'm getting the hard part out of the way.

    95bac96c9e4446f311f634c14b6dd6d3.jpg


    Sent from my iPhone using Tapatalk
     

    Younggun

    Certified Jackass
    TGT Supporter
    Local Business Supporter
    Rating - 100%
    6   0   0
    Jul 31, 2011
    53,727
    96
    hill co.
    I'm not patient at all and angry on the inside. These models are like therapy for me. I get in the back room where it's quiet and for some reason I feel calm and centered.

    I wouldn't even consider doing a jigsaw puzzle or anything like that. Don't have the patience for it and would think about how stupid it was while I was wasting time on it.


    Sent from my iPhone using Tapatalk
     

    Younggun

    Certified Jackass
    TGT Supporter
    Local Business Supporter
    Rating - 100%
    6   0   0
    Jul 31, 2011
    53,727
    96
    hill co.
    Wing tip assembly is a bitch. It say to bend this soar down and attach it to the wing tip so it will contour for the sheeting to lay over. Problem is, it isn't that flexible.

    714912d829214ab4cc824d7b28ecc1b7.jpg


    I decided to cut it off at the nearest spar, then sanded and shaped a piece of 5/16" balsa to make the curve which was then glued in to place and the sheeting laid over it.

    ae987db63ab056adf446608c8d61298f.jpg


    Even the 1/16" balsa sheeting was tough to flex in to place and get glued down but I got it done and only stuck my fingers to the wing a few times. Then flipped the wing over and went through it again on the bottom. Shaped the aileron to match the wing profile then sanded and contoured the wing tips, again the instruction were pretty iffy. Just looked at some pictures of Cubs for inspiration.

    Wing is muscly complete, just need to add gussets for strength made from scraps and build some servo and control horn mounts.

    85f08ef9dbbc42d282f482f593fb730b.jpg


    I tend to lose track of time when working on it but I'd guess I've got about 8-10 hours in this wing. 1 more to go and build the center section then it's on to the fuselage. At some point I have to make the wing struts as well. No idea how that's gonna work.


    Sent from my iPhone using Tapatalk
     

    Younggun

    Certified Jackass
    TGT Supporter
    Local Business Supporter
    Rating - 100%
    6   0   0
    Jul 31, 2011
    53,727
    96
    hill co.
    Got the second wing mostly done. Still need to add some gussets for strength. I'll do it one day while I'm waiting for something else to dry.

    Thought sanded and shaped the wing tips and leading edges. Will ad some fill where the LE meets the tips and blend it together for a smooth finish.

    90f4ca9f4a1a8f30d5e18ae9d9735655.jpg


    5e865dfe2796e9a6ae406cd18a141a00.jpg


    Center section of the wing is next. Two pieces of plywood get sandwiched together for the wing joiner. I started to go with a fast drying glue but went with 30 minute epoxy instead which allows more flex without the glue breaking. I'll let it cure till tomorrow. Should have the full wing together tomorrow evening but won't make it permanent until I have a chance to test fit on the fuselage.


    Sent from my iPhone using Tapatalk
     

    Younggun

    Certified Jackass
    TGT Supporter
    Local Business Supporter
    Rating - 100%
    6   0   0
    Jul 31, 2011
    53,727
    96
    hill co.
    I know it's been around since at least the early '80s and I think I read somewhere that it was introduced some time in the '70s.

    I probably wouldn't have bought it myself simply because I'd be worried about the step up in difficulty. I'm glad she give it for me though. I'm really enjoying it though and should be a fun flying plane. And the experience I get building it will really go along ways towards stepping up to a warbird kit.


    Sent from my iPhone using Tapatalk
     

    Dawico

    Uncoiled
    Lifetime Member
    Rating - 100%
    15   0   0
    Oct 15, 2009
    38,075
    96
    Lampasas, Texas
    Was this type of kit popular back then? Were other manufacturers offering a comparable kit or was this one difficult even by their standards at that time?

    I know everything is geared toward "ease of assembly" now days but what about back then? Or do you know?

    I am just curious. I could see a kit of this difficulty being bought, opened, closed back up and never touched again. Or is this kit normal for that period?

    I definitely commend your dedication and time for building this plane. It seems above what most others would tackle.
     

    Younggun

    Certified Jackass
    TGT Supporter
    Local Business Supporter
    Rating - 100%
    6   0   0
    Jul 31, 2011
    53,727
    96
    hill co.
    TL;DR at bottom

    I'd say it was as popular as any other. Used to be every plane was a kit, there was no such thing as buy and fly.

    I'd say it was probably an average difficulty kit when it first came out. Some old timers wouldn't bar an eye. The tools available make a difference as well.

    Really, it's just a kit for an experienced builder. Or probably a good kit for someone like me with an experienced builder available to give advice.


    It's hard to really classify it since standards have changed so much since it was introduced. Now days parts are laser cut and fir the most part don't require much fitting, many planes are t even available as kits anymore being replaced by ARFs that only require final assembly.


    If this was my first kit and I was doing it on my own, I can see a reasonable person boxing it up and sticking it on the shelf. I'm stubborn so I'd probably build it poorly.

    When it came out it was probably closer to average difficulty and really not bad for its scale accuracy.


    Sent from my iPhone using Tapatalk
     

    Younggun

    Certified Jackass
    TGT Supporter
    Local Business Supporter
    Rating - 100%
    6   0   0
    Jul 31, 2011
    53,727
    96
    hill co.
    Center section added and ribs fitted for wing joiner, set dihedral and final fitting ready for epoxy.

    5649c886b0b11385e73bb64a86e6c158.jpg


    Epoxy on the joints, clamped together and drying.

    a60cdd6289e94256163766a747efee1f.jpg


    Epoxy was pretty thick from sitting near the cold floor so I cranked the heat up to 75 to make sure it cures properly. Will do the last bit of balsa covering tomorrow and all that will remain will be servo mounts, unless I decide to use the bell crank system as intended. Not really a fan of it though.


    Sent from my iPhone using Tapatalk
     

    Younggun

    Certified Jackass
    TGT Supporter
    Local Business Supporter
    Rating - 100%
    6   0   0
    Jul 31, 2011
    53,727
    96
    hill co.
    It'll just return to its original state.


    Sent from my iPhone using Tapatalk
     
    Top Bottom